
Free Pattern
Step-by-Step
Crochet
Granny Squares70’s Retro Vintage Daisy Flower Granny Square — Free Crochet Pattern
Crochet a 70's retro daisy flower granny square with 8 layered petals. Free pattern with rainbow and hidden-petal color variations for vintage blankets
Level IntermediateTime 1-2 HoursHook 3.00 mmYarn DK / Sport
About This Pattern
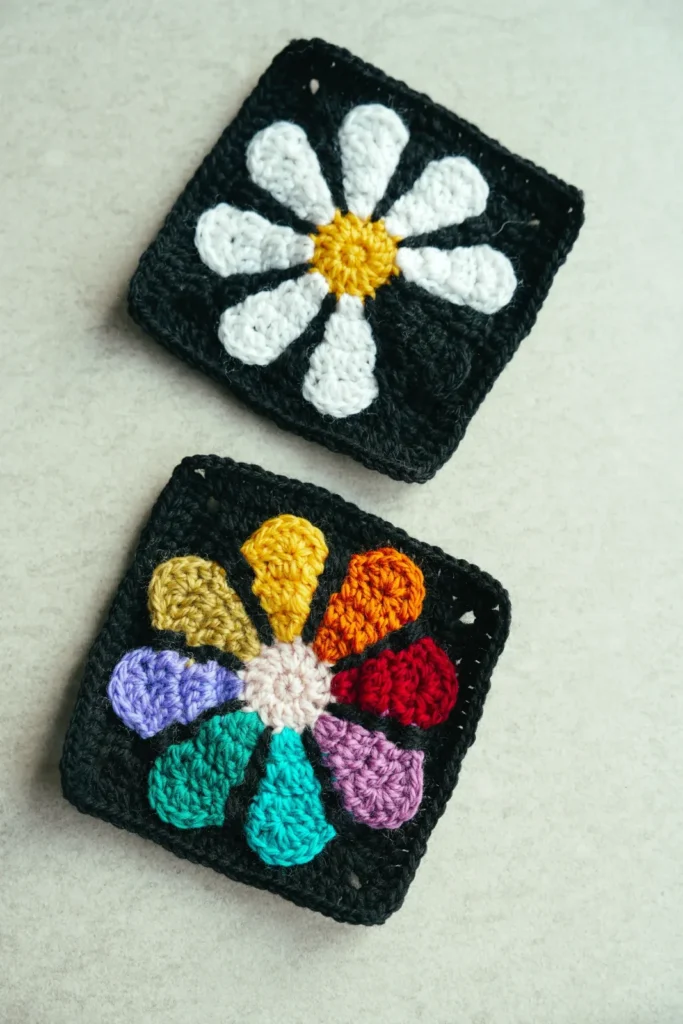
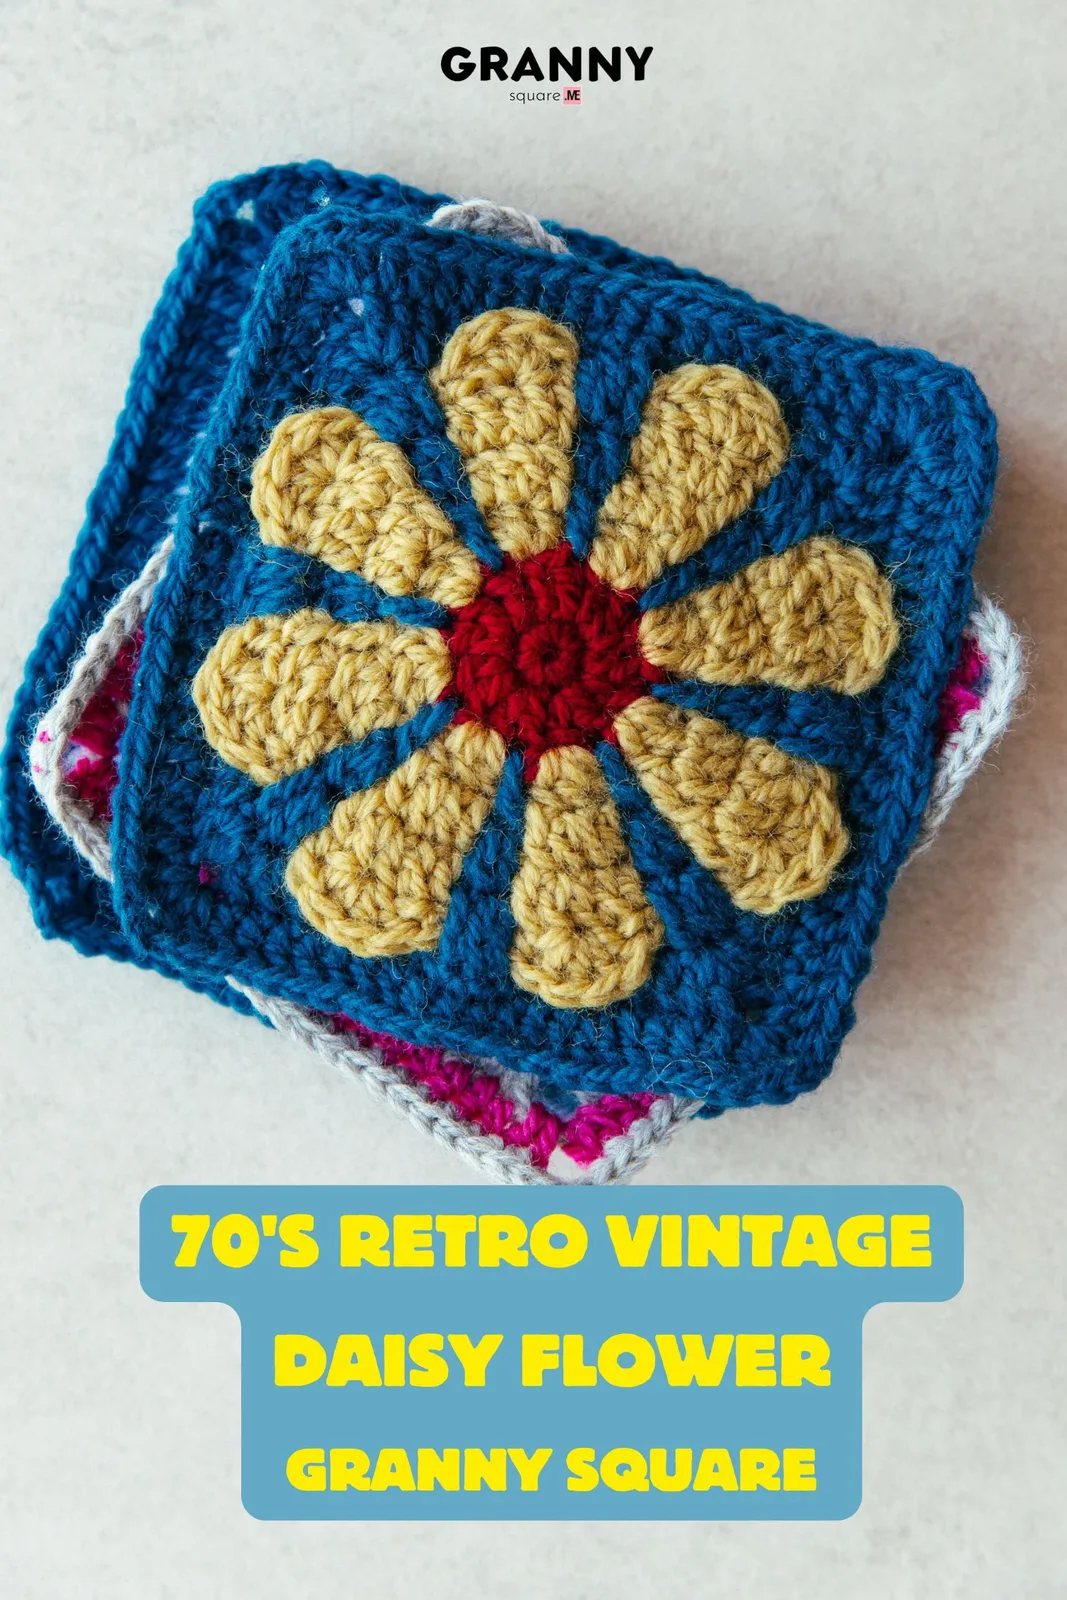
This pattern creates a bold, unapologetically retro daisy flower worked in the round and then squared off into a tidy 5.5-inch block. The daisy sits front and center with distinct, sculpted petals radiating from a contrasting center, framed by a solid background that makes every petal pop. It's built across 11 rounds using three colors, so it's perfect for crocheters who love a project with visible progress and a payoff at the end of every round rather than a long stretch of identical stitching
You'll work a center circle, build the petal round, then transition from circle to square — the classic granny-square challenge where corner placement decides whether your block lies flat or ruffles. Expect confident color changes, working into spaces rather than stitch tops, and counting corners carefully. If you can manage a standard granny square and you're not afraid to join a new color mid-round, you're ready. Most crocheters finish a square in one to two hours, faster once the rhythm clicks
The finished square measures 5.5 by 5.5 inches in DK sport weight with a 3.00 mm hook — noticeably larger than an ordinary granny square, which means a blanket comes together with far fewer blocks. The fabric is dense enough to hold its shape but still drapes, and the daisy reads clearly from across a room. Stitch a dozen for a cushion cover, thirty-five for a lap blanket, or a single one as a coaster, bag panel, or a gift-topper that looks far more complicated than it was
Variations
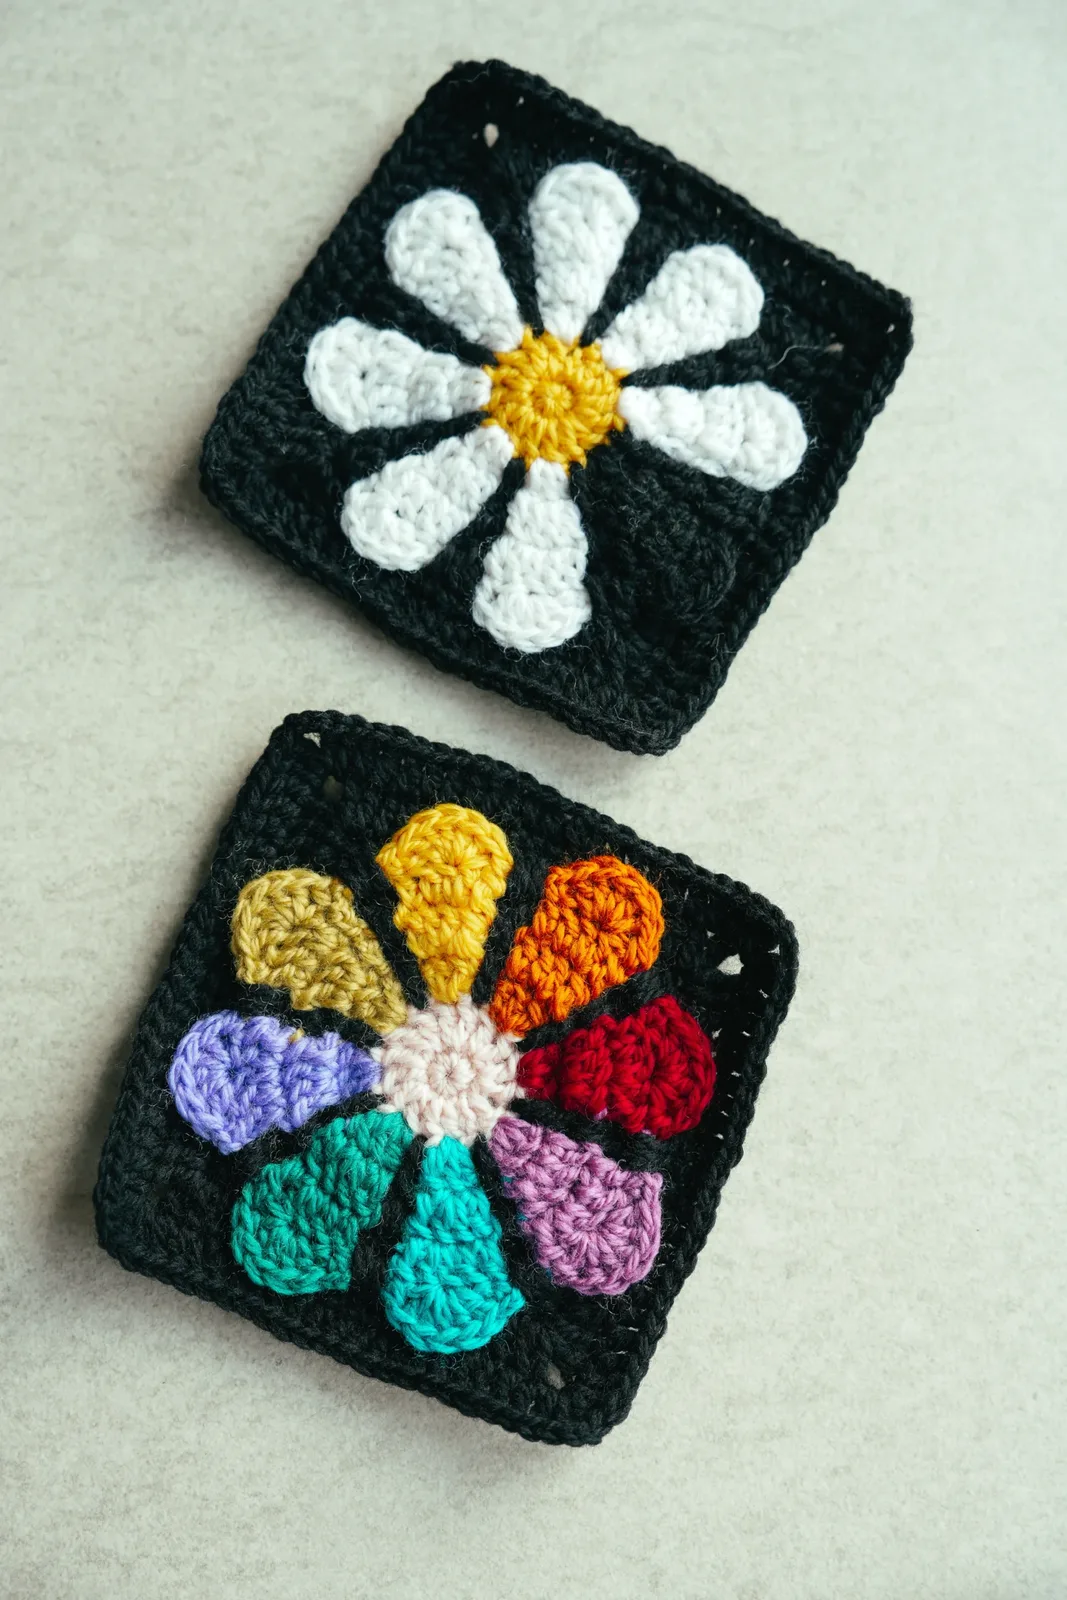
The two variations from the original designer are your best starting points. For the rainbow daisy, change color on every single petal — red, orange, yellow, green, blue, indigo, violet around the circle — keeping the center and background constant so the chaos stays anchored. For the hidden-petal version, crochet just one petal in the exact background color; from a distance the daisy looks like it's missing a piece, and scattered randomly across a blanket it creates a lovely rhythm. For a true 70's palette, go with mustard petals, a burnt-orange center, and a cream background — that's the vintage afghan look. Avocado green petals with a rust center hit the same era. If you want something softer, try dusty pink petals, buttercream center, and sage background. For high contrast, all-white petals with a sunny yellow center on a deep navy background reads crisp and modern rather than vintage. Size is easy to adjust. Stick with DK and a 3.00 mm hook for the stated 5.5-inch square. Move to worsted weight with a 4.00 mm hook and the same 11 rounds and you'll land closer to 7 inches — ideal for a fast throw. Going down to a 4-ply cotton with a 2.50 mm hook gives roughly 4.5 inches and a firmer fabric perfect for coasters or a market bag panel. Yarn-wise, Paintbox Simply DK gives you the widest color range for the rainbow version, Scheepjes Catona in cotton gives crisp petal definition, and any DK acrylic works beautifully for a washable baby blanket. For a seasonal spin: orange and black petals for autumn, pale blue and white for a winter set, or all-cream tonal petals for a wedding blanket
I have a real weakness for this one. The moment the petal round is finished and you sit back and see that daisy shape emerge from what was just a fuzzy little circle a minute ago — that's the hook, every single time. What I love most is how much control this pattern hands you. The original designer points out two variations right away: give every petal its own color for a rainbow daisy, or crochet one petal in the background color so it seems to vanish into the square. That second trick is so clever and so simple, and it makes a whole blanket look intentionally designed rather than repetitive. I also love that this square is bigger than my usual ones — 5.5 inches means a blanket grows in a satisfying hurry, and I'm not weaving in ends until my patience runs out. And the moment where the circle becomes a square is genuinely fun to watch happen under your hands. Three colors, eleven rounds, one very good-looking flower. It's the kind of square you make one of and then immediately start another
Common mistakes
- Petals come out uneven — some fat and
- Petal shaping depends entirely on consistent tension across the stitches that form each petal. If you tighten up partway through a petal, that one shrinks. Work all petals at the same speed and tension, and if you have to put the project down, finish the current petal first rather than stopping mid-petal. Blocking evens out small differences, but it won't rescue a petal that's genuinely short a stitch — count as you go
- The square ruffles at the edges or cups
- This is the circle-to-square transition doing its job badly. Ruffling means too many stitches in the corner rounds; cupping means too few. Lay the piece flat after each round from the transition onward and check. If it ruffles, you've likely added extra stitches along the straight sides — those should stay plain while the corners do the growing. If it cups, your corners need more stitches to accommodate the wider outer edge
- Color changes leave visible jogs or a
- Every join creates a small step where the round ends. Rotate where you join each new color — don't start every round in the same spot. Better yet, on the daisy rounds, hide your joins under a petal rather than in open background. When you fasten off a color, leave a 6-inch tail and weave it in along the direction of the stitches, not across them, so it disappears into the fabric
- The center circle puckers or leaves a
- A hole in the center usually means the starting ring wasn't pulled fully closed. If you started with a chain ring, snug it up hard before working round two and secure the tail with a firm tug. If you used a magic ring, pull the tail all the way tight after completing the first round, then weave that tail through the back of the center stitches so it can't slip loose in the wash
- The rainbow variation looks muddy
- When every petal is a different color, adjacent petals of similar value sit right next to each other and lose definition. Alternate warm and cool, or light and dark, around the circle rather than following spectrum order strictly. Also make sure your background color contrasts with all of them — a mid-grey or cream background lets every petal keep its identity, while a coloured background will fight at least two of them
- Squares come out different sizes across
- The stated 5.5 inches assumes DK sport weight and a 3.00 mm hook. Yarn from a different dye lot, a different brand at the same nominal weight, or simply crocheting more tightly when you're tired will shift the size. Make one square, measure it, and use it as your reference — check every third or fourth square against it. Block all squares to identical dimensions before joining
- Stitches worked into the wrong place
- flower rounds it's easy to work into the top of a stitch when the pattern wants the space beside it, or vice versa. Before you start each round, look at where the previous round's stitches sit and identify your target — space or stitch top — then commit to it for the whole round. Consistency matters more than which one you chose; mixing the two mid-round is what warps the petal


Intermediate
Materials
- Yarn of your choice - 3 colors (DK sport weight used for the 5.5 inch sample)
- Crochet hook - 3.00 mm used for the sample
- Darning Needle
- Scissors
How to Crochet 70’s Retro Vintage Daisy Flower Granny Square
This square uses a combination of basic crochet stitches to create clean definition between the flower elements and the frame, resulting in a bold, graphic look that's both traditional and modern. It involves a lot of crochet with different yarns and line spacing, so work through the step-by-step instructions round by round.
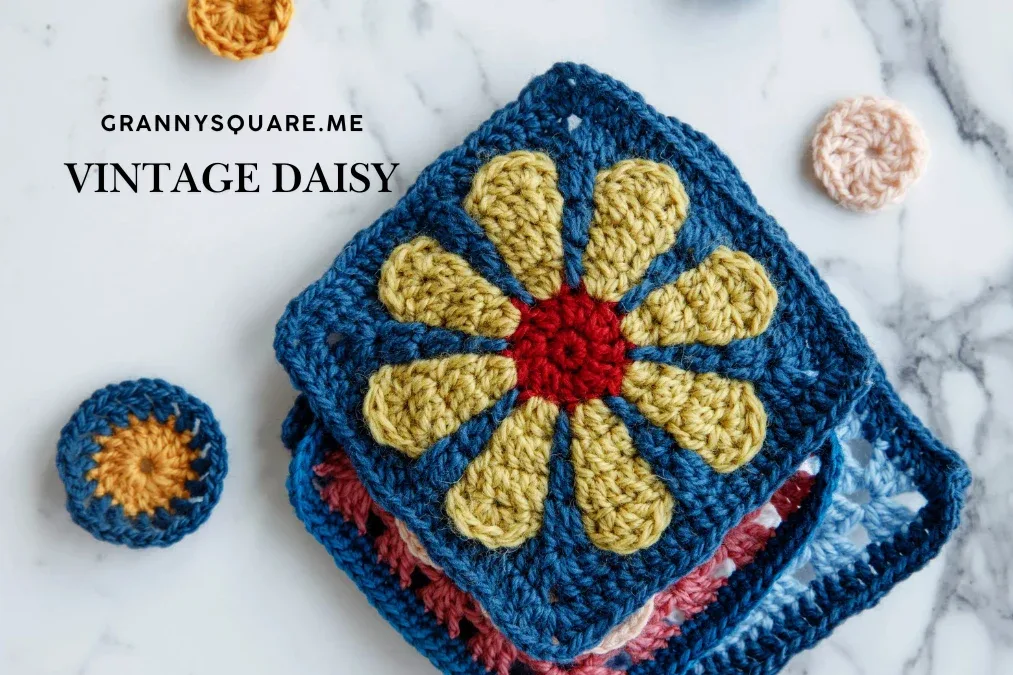
A sunny flower blooms across this square with eight rounded petals in warm yellow surrounding a deep red center, creating a classic daisy design with lovely textural depth.
Round 1 makes the center of the retro daisy flower.
- Round 1magic ring, ch1 as standing st, 8sc, slst to the first sc.Step by step: Start with a magic ring; ch1 as standing st; make 8 single stitches, slst to the first sc. Round 1 finished.Round 2 works another round of the center.
- Round 2ch3(count as dc), dc in same st, *dc inc in the next st* repeat 7 times, slst to top of ch3, fasten off (16).Step by step: make ch3 as a standing st(count as dc); dc in the same st; *dc inc in the next st* repeat 7 times, slst to the top of ch3, fasten off, round 2 finished.(16)
- Round 3Join new yarn in any st, ch3(count as dc), 2dc in same st, ch, [sk1, 3dc in next st, ch] rep 7 times, slst to top of first ch3 (24).Step by step: Add new color yarn, pull the new color yarn through any stitch; make ch3 as a standing st(count as dc); 2dc in same stitch, ch; [sk1, 3dc in next st, ch] repeat 7 times, slst to top of first ch3, round 3 finished.Round 4 adds the daisy petals.(24)
Note: Enlarge the yellow loop on hook, remove hook carefully, save this loop for later use. This loop will be used in a later round.
- Round 4Join new color yarn in skipped dc from round 2, ch3(count as dc), ch4, [dc in the next skipped dc, ch4] rep 7 times, slst to top of first ch3 (8).Step by step: Insert your hook into any skipped dc from round 2; add new color yarn in this st; ch3 as a standing st (count as dc), then ch4; dc in the next skipped dc, ch4; [dc in the next skipped dc, ch4] repeat 6 times, slst to top of ch3, round 4 finished.(8)
Note: Enlarge the blue loop on hook, remove hook carefully. Save this blue loop for later use.
- Round 5Continue with yellow color, ch3(count as 1dc), work in round 3, dc inc, dc, ch2, [dc, dc inc, dc, ch2] rep 7 times, slst to top of ch3.Step by step: Continue with the yellow yarn, ch3 as a standing stitch (count as 1dc); crochet in stitches from round 3; work dc in next dc stitch; dc in the same st, dc in the next st, ch2.[dc, dc inc, dc, ch2] repeat 7 times, sl st to the top of the first ch3. Round 5 finished.
Note: Enlarge the yellow loop on hook, remove hook carefully. Save this loop for later use — it will be used in a later round.
- Round 6Blue yarn: ch3(count as dc)+dc+ch4, [2dc+ch4 in next blue dc st] repeat 7 times, sl st to the top of the first ch3.Step by step: Take out the blue yarn; insert your hook into this blue loop; ch3 as a standing st (count as dc); dc+ch4 in the same st.[2dc+ch4 in the next blue dc st] repeat 7 times, sl st to the top of the first ch3, remove the hook. Round 6 finished.
Note: Save this blue loop for later use.
- Round 7Yellow yarn: ch3(count as dc), dc inc, 2dc, ch2, [dc, dc inc, 2dc, ch2] repeat 7 times, sl st to the top of the first ch3.Step by step: Insert your hook into the yellow loop; ch3 as a standing st (count as dc); dc inc, 2dc, ch2.[dc, dc inc, 2dc, ch2] repeat 7 times, sl st to the top of the first ch3. Round 7 finished.
Note: Save this loop for later use.
- Round 8ch1+sc, sk, 5 dc in the same st, sk, sc in next st, sk blue part, work in yellow cluster only, [sc, sk, 5dc in same st, sk, sc] rep 7 times, slst to the first sc, fasten off.Step by step: Make ch1 as standing st; sc in the same st; skip 1, dc; 4 dc in the same stitch, skip 1, sc in next stitch, ch2. We have finished one shell petal.skip blue part, work in yellow cluster only. [sc, sk1, 5dc in same stitch, sk1, sc, ch2] repeat 7 times, slst to the first sc, fasten off. Round 8 finished.
- Round 9blue yarn, ch3(count as dc), dc inc, 5dc behind the yellow cluster in blue ch-sp, [dc, dc inc, 5dc in blue ch-sp] rep 7 times, slst to top of ch3.Step by step: Continue with the blue yarn, crochet in blue stitches only for this round.Make ch3 as a standing stitch(count as dc); dc in next dc stitch; make 1dc in same dc stitch(this is a dc inc).[make 1dc, dc inc, 5dc in blue ch-sp] repeat 7 times, slst to top of ch3. Round 9 finished.
Note: we will work the following stitches in blue ch-sp on the wrong side. make 5dc in blue ch-sp behind the yellow cluster.
- Round 10ch1+sc, 5sc, 2hdc, dc, 2dc+ch2+2dc, dc, 2hdc, 3sc, [6sc, 2hdc, dc, 2dc+ch2+2dc, dc, 2hdc, 3sc] repeat 3 times. slst to the first sc (76).Step by step: we continue with blue yarn for this round. ch1 as standing; sc in the same st, make 5 single stitches.2hdc, dc, 2dc+ch2+2dc, dc, 2hdc, 3sc.[6sc, 2hdc, dc, 2dc+ch2+2dc, dc, 2hdc, 3sc] repeat 3 times. slst to the first sc. Round 10 finished.(76)
- Round 11ch3(count as dc), 2hdc, 8sc, (dc inc+ch2 +dc inc) in corner sp, 8dc, [3hdc, 8dc, (dc inc+ch2+dc inc) in the corner sp, 8dc] rep 3 times, slst to top of ch3, fasten off (92).Step by step: Continue the blue yarn, make ch2 as standing stitch (count as hdc); make 2hdc; then make 8dc; (dc inc+ch2 +dc inc) in corner space, and then make 8dc.[3hdc, 8dc, (dc inc+ch2+dc inc) in the corner space, 8dc] repeat 3 times, slst to top of ch2, fasten off and weave in ends. Now we finished a retro daisy granny square.(92)
Rainbow Petals Version
Want to take your daisy granny square to the next level? This variation uses the same pattern, but with a vibrant twist: each petal is made with a different color. The key is simple color changes during the chain spaces, demonstrated in Rounds 3 (ch1) and 5 (ch2) below.
It's a great way to use up your yarn scraps and create unique, eye-catching pieces. Below you'll find simple tips for seamless color changes to make your petal daisy granny square.
Rounds 1-2 remain unchanged. When you start Round 3 (first petal round), work your first 3dc cluster(ch3+2dc) as normal. To change color: take your new color yarn and ch1. This completes the color switch. Continue the pattern: [sk1, 3dc] in the new color.
To finish this round: always ch1 with a new color to change color. After the last [sk1, 3dc], switch back to your first color. Ch1, then slst to the top of the initial ch3 to join.
When you start Round 5, work your first cluster (ch3, dc inc, 1dc) as normal. The following is ch-2. To change color for the next petal, work the first ch in your current color. Complete the second ch by pulling through the color of the upcoming petal. Then, work the next petal cluster in the new color. Repeat this process for every ch-2 space in this round.
Remember to switch back to the first color at the end, and slst to the top of the first ch3.
For All Following Rounds
The pattern (stitch counts and placements) remains the same as in the tutorial above. The only difference is color management.
Maintain the same color sequence established in Round 3.
The color change method remains consistent: always complete the color switch during the chain before a new color petal.
If ch1 is before a petal, use that ch1 to pull through the new color.
If ch2, work the first ch in the current color, then use the second ch to pull through the new color.
This keeps all your color transitions neat and aligned.
Important notes
💡 Gauge: the finished granny square is 5.5 inches by 5.5 inches with DK sport weight and a 3.00 mm hook — a medium-sized granny square, larger than most ordinary granny squares. If your first square measures noticeably bigger or smaller, adjust hook size rather than changing the stitch counts — a half-millimetre either way is usually all it takes
💡 This square is intentionally larger than most ordinary granny squares, so plan your blanket count accordingly. A 35 x 44 inch baby blanket needs roughly 48 squares, not the 70-plus you'd need with a standard 4-inch block
💡 Place a stitch marker in the first stitch of every round, especially through rounds 5-11. Once the petals and the corner transitions start, losing your round start is the fastest route to a lopsided square
💡 With three colors and 11 rounds, you'll accumulate a lot of ends. Weave each tail in as soon as you fasten off that color rather than saving them all for the end — a batch of thirty squares with unwoven ends is a genuinely miserable evening
💡 For the rainbow-petal variation, cut and join a new color per petal and leave generous 6-inch tails. Short tails on individual petals work loose with washing, and there's very little fabric to anchor them in
💡 Block every square before joining. Pin to 5.5 inches square on a foam mat, spritz with water, and let dry fully. Crochet flowers in particular relax into a much better shape after blocking, and the petals sit flatter and rounder
💡 Keep your three yarn balls in separate bowls or a divided project bag while you work. With frequent color changes across 11 rounds, tangled strands are the single biggest time-waster on this pattern
More photos
FAQ
How many of these squares do I need for a blanket?
Each square finishes at 5.5 x 5.5 inches in DK with a 3.00 mm hook, so a 44 x 55 inch throw needs 80 squares in an 8 x 10 layout. A baby blanket around 33 x 44 inches takes 48 squares, and a generous lap blanket sits comfortably around 60
Can I use worsted weight yarn instead of DK sport?
Absolutely — just size up to a 4.00 mm or 4.50 mm hook and expect a finished square closer to 7 inches. Keep the stitch counts exactly as written; the pattern scales fine, you'll just need fewer squares for the same blanket size
What's the trick to making one petal disappear?
Crochet a single petal using the same yarn as your background color instead of the petal color. From a short distance the daisy looks like it's missing a petal, which is a charming effect — scatter these among regular squares across a blanket for a subtle bit of visual interest
Why won't my square lie flat?
Almost always it's the rounds where the circle becomes a square. Ruffled edges mean you added too many stitches along the straight sides; a cupped center means the corners need more. Check the piece flat after every round from the transition onward, and block the finished square to settle any minor waviness
Is this pattern suitable for a beginner?
It's best described as advanced beginner to intermediate. You'll need to be comfortable working in the round, joining new colors, and following corner placement over 11 rounds. If you've already made a plain granny square, this is a very reasonable next step up
Made your own square?
This site belongs to every crocheter. Share your design with the world — we’ll math-check the counts, polish it up, and publish it free for everyone, credited to you.
🧵 Share your pattern →
0 / 0 rounds