
Free Pattern
Step-by-Step
Crochet
Granny SquaresCherry Blossom Granny Square — Free Crochet Flower Pattern
Crochet a delicate cherry blossom granny square with soft pink petals and a deep center. Free 7-round pattern perfect for blankets and coasters
Level EasyTime 2-3 HoursHook 3.00 mmYarn DK
About This Pattern
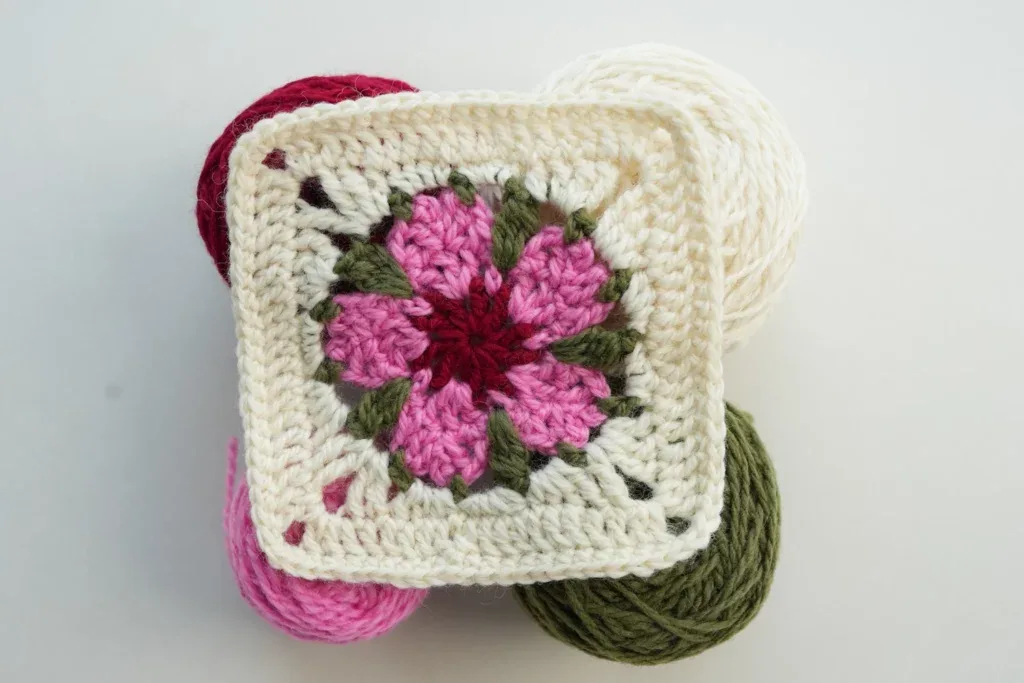
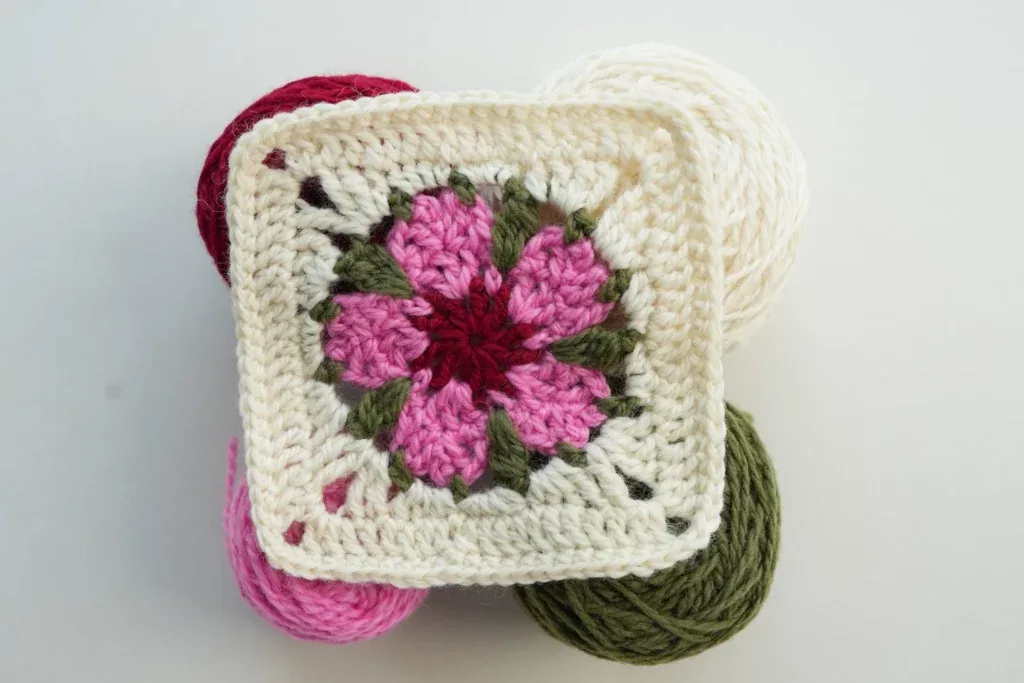
This Cherry Blossom Granny Square turns four simple colors into a delicate spring flower captured inside a classic square. Instead of the usual clustered corners, Round 1 opens with a magic ring and a wheel of double-crochet-and-chain spaces that become the blossom's petals, while the later rounds frame that flower and square everything up. It's perfect for crocheters who love florals, want a quick collectible motif, and dream of a cherry-blossom blanket, a set of coasters, or a pillow made one bloom at a time
The techniques here are refreshingly approachable. You'll start with a magic ring, use a ch-3 that counts as your first dc, work double crochets separated by chain spaces, and join fresh colors with a standing stitch in any ch-space. Nothing more exotic than dc, ch, and sc appears across all seven rounds, so a confident beginner can absolutely handle it. Expect to spend roughly two to three relaxed hours per square once you've made your first one and the color-change rhythm truly clicks
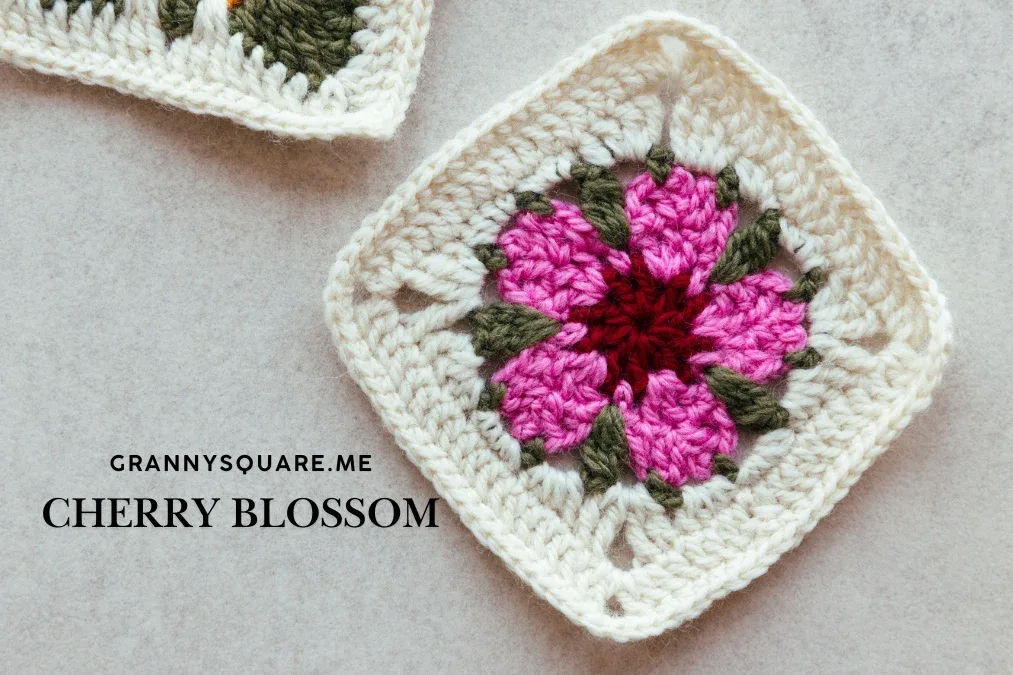
The finished square measures about 4.33 × 4.33 inches — small enough to work up in an evening, big enough to show off those soft pink petals and deep flower center. Blocked, it lies flat and crisp, with an open, airy petal ring that catches the light. It feels dainty yet sturdy, which makes it a lovely handmade gift: stitch a single bloom into a coaster, a garland of squares into a baby blanket, or a cluster into a spring-themed tote or cushion
Variations
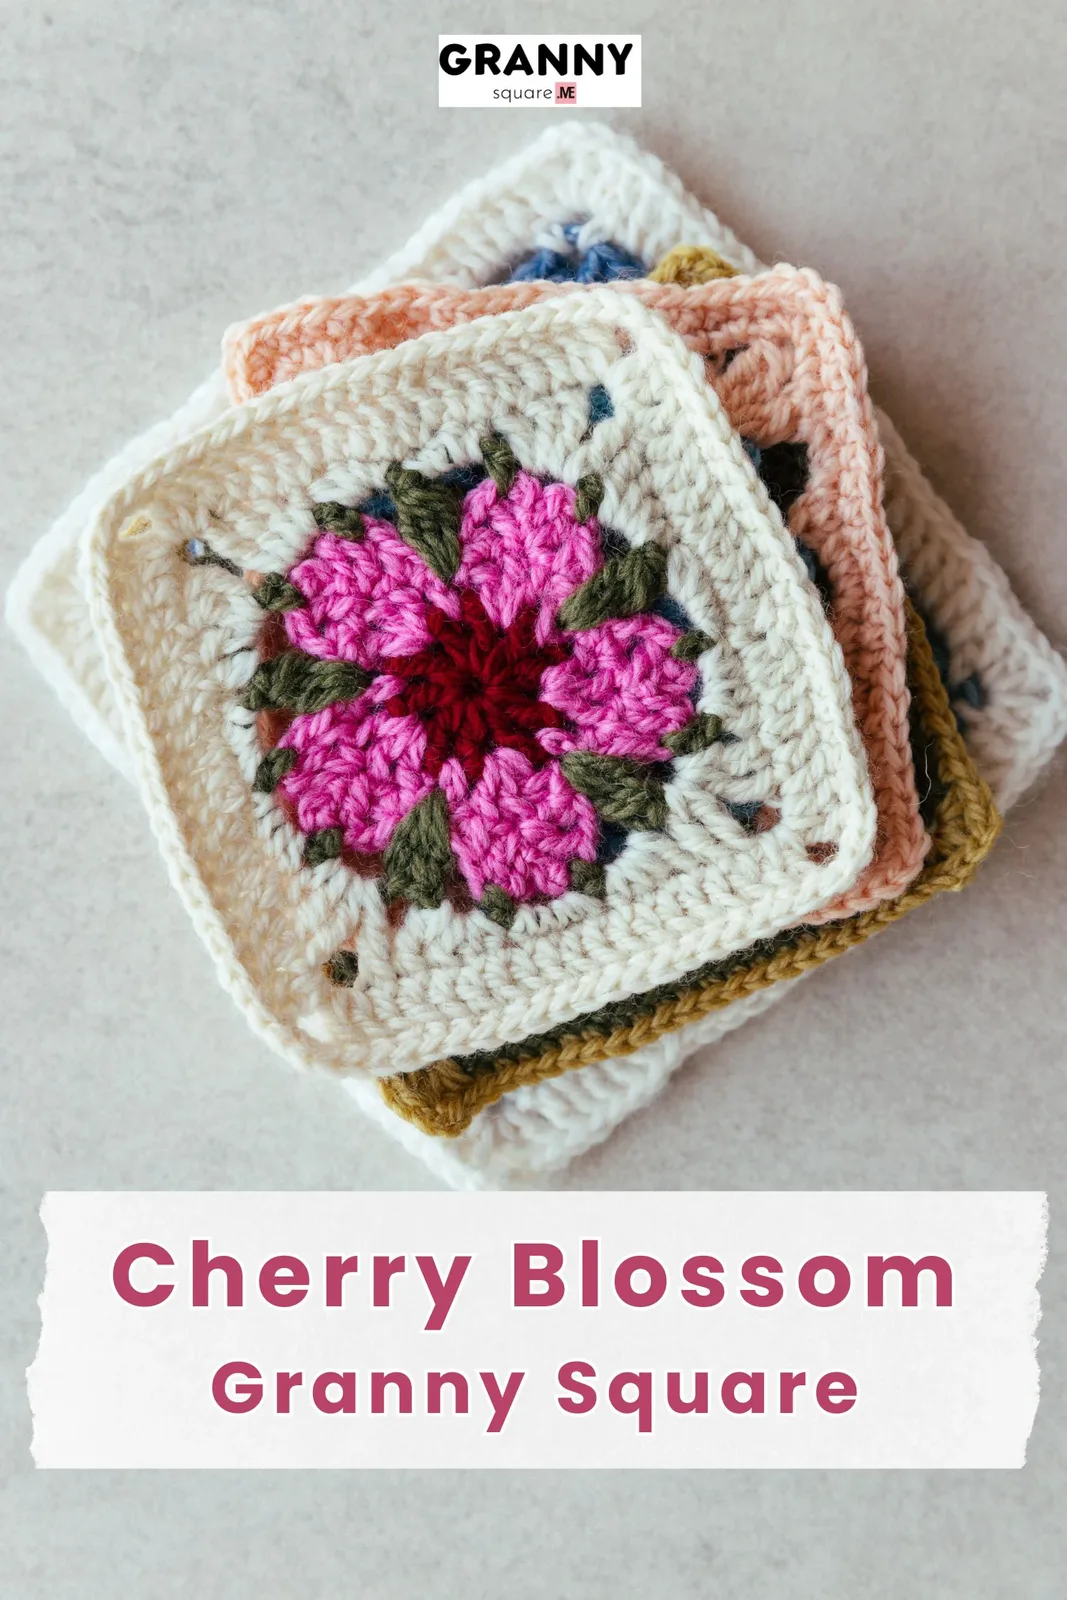
The color story is where this square really comes alive. The designer chose these colors to mimic authentic cherry blossoms with their distinctive deep centers and soft pink petals. For different looks, try a light purple center with white petals for a lilac-inspired version, or go bold with a yellow center and orange petals for a cheerful summer bloom effect. For a wild-cherry vibe, pair white petals with a chartreuse center and a brown-to-taupe outer border like bare branches. Want a bigger square? Because the flower is finished in the early rounds, you can simply add extra dc-and-chain rounds after Round 7 — each added round grows the square by roughly half an inch, so two extra rounds turn a 4.33-inch motif into a generous 5.5-inch block and fewer squares per blanket. Prefer them tiny? Stop a round early for a dainty ~3.5-inch coaster. Yarn swaps change the whole mood. In a cotton, the petals stay crisp and the square blocks flat — ideal for coasters and washcloths. In a soft acrylic or acrylic-wool blend (with a 4mm hook), you get a squishier, blanket-friendly bloom. For an heirloom baby version, a merino DK gives the petals a lovely sheen. Themed ideas: pale pink and cream for a nursery, red-and-white for a festive winter motif, or an all-white 'snow blossom' worked in a fluffy fingering weight
I have such a soft spot for this little square, and it starts the moment that magic ring pulls closed and the first ring of dc-and-chain petals fans out — it genuinely looks like a blossom before you've even changed colors. What I love most is how Round 2 builds those three-dc petal clusters (that dc ch dc ch dc ch grouping) around each sc, so the flower grows fuller and more dimensional with almost no effort. Every color change with the standing stitch feels like a tiny reveal, watching the deep center give way to soft pink petals. It's meditative in the best way: the chain spaces give your hands a predictable rhythm, and because each square is only about 4.33 inches, you get that finished-project hit fast. I also love that it squares up so neatly in the later rounds — there's something deeply satisfying about a flower motif that still behaves like a proper granny square when it's time to join. Make one and I promise you'll cast on a whole spring garden
Common mistakes
- Miscounting the dc-and-chain repeats in
- Count out loud as you work [dc, ch] around the magic ring and use a stitch marker in the very first ch-space. Every later petal cluster in Round 2 lands in one of these spaces, so getting the count right now keeps the whole flower symmetrical
- Forgetting that the ch-3 counts as the
- Treat the ch-3 as your first stitch, not as a turning chain plus a dc. When you reach the end of the round, sl st into the TOP of that ch-3 — not into an extra stitch — so your count stays exact
- Working the dc ch dc ch dc ch petal
- Remember the rhythm: sc-ch goes in one ch-space, then the full three-dc petal cluster goes in the NEXT ch-space. If a petal looks squished, you've likely doubled up in one space — pull back and re-seat the cluster in the correct spot
- Pulling the magic ring closed too
- Once Round 1 is complete, give the magic ring's tail a firm tug to cinch the center shut, then weave that tail in securely with your darning needle so it can't work loose later
- Joining a new color too tightly at the
- When you join new yarn in any ch-space and make your standing stitch, keep the first pull-through relaxed and matched to your normal tension. A gentle join blends invisibly; a tight one dents the petal ring
- The square not lying flat or squaring
- Keep your chain spaces consistent and don't over-tighten the corners. A quick spray- or wet-block at the end relaxes any waviness and locks the square to its ~4.33-inch shape with crisp, open petals


Easy
Materials
- Yarn of your choice- 4 colors
- Crochet hook – we are using a 3.00mm hook
- Darning Needle
- Scissors
How to Crochet Cherry Blossom Granny Square
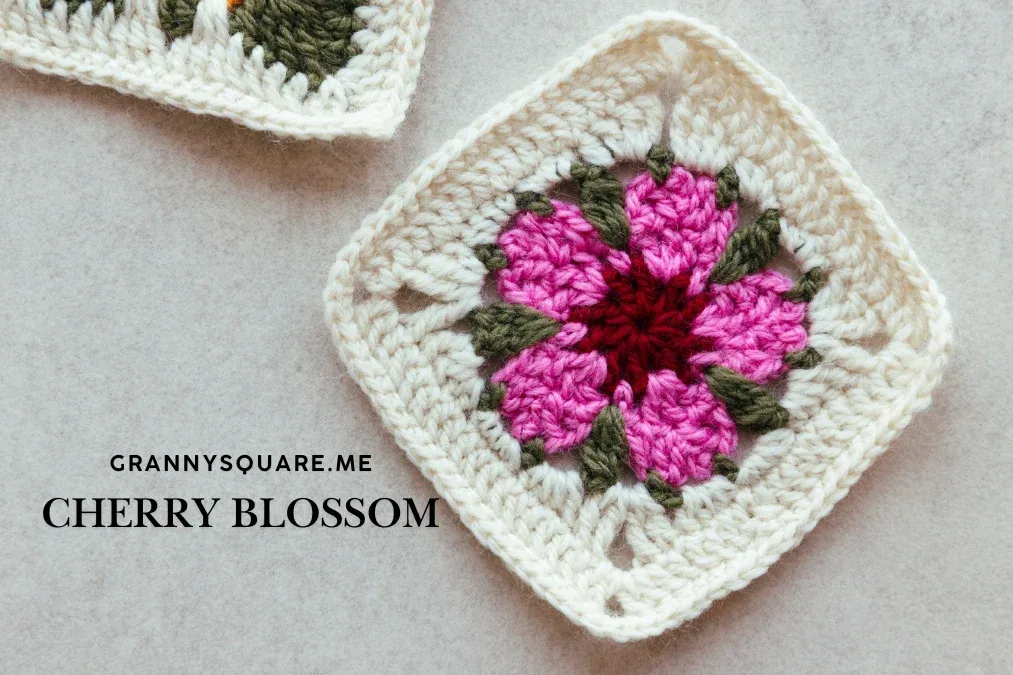
A single cherry blossom rests gently on this creamy granny square, its pink petals forever caught in that perfect moment before spring's breeze carries them away. This pattern is quite beginner-friendly, with detailed step-by-step guidance for each of the seven rounds.
- Round 1Start with a magic ring, ch3(count as dc), ch, [dc in the loop, ch] repeat 9 times, sl st to the top of the first ch3, fasten off (10).Step by step Step by step: Start with a magic ring. Make ch3 as a standing st (count as dc), then continue to make ch. dc in the loop. ch. [dc, ch] repeat 8 times, sl st to the top of the first ch3, fasten off. Round 1 finished. (10)
- Round 2Join new yarn in any ch-sp, ch as a standing st, sc in the same ch-sp, ch, dc ch dc ch dc ch in the next ch-sp, [sc ch in the next ch-sp, dc ch dc ch dc ch in the next ch-sp] repeat 4 times, sl st to the first sc.Step by step Step by step: Join new color of yarn in any ch-sp. ch as a standing st. sc in the same ch-sp. ch. dc in the next ch-sp. ch. dc ch dc ch in the same ch-sp. sc in the next ch-sp, ch. [dc ch dc ch dc ch in the next ch-sp, sc ch in the next ch-sp] repeat 3 times, dc ch dc ch dc ch in the next ch-sp, sl st to the first sc. Round 2 finished.
- Round 3Skip the next ch, sl st to the next dc st, ch as a standing st, sc hdc in the same st, ch, dc in the next st, ch3, sl st to the same st, ch3 dc, ch, hdc sc in the next st, [sc hdc in the next st, ch, dc in the next st, ch3, sl st to the same st, ch3 dc, ch, hdc sc in the next st] repeat 4 times, sl st to the first sc, fasten off.
Step by step Step by step: Skip the next chain, sl st to the next dc st, so we can start this round from this st. ch as a standing st. sc in the same st. hdc in the same st, ch. dc in the next st, ch3, sl st to the same st, ch3 dc, ch. hdc sc in the next st. [sc hdc in the next st, ch, dc in the next st, ch3, sl st to the same st, ch3 dc, ch, hdc sc in the next st] repeat 4 times, sl st to the first sc, fasten off. Round 3 finished.
- Round 4Join new yarn in the gap between two petals, ch2 as a standing st (count as incomplete dc), 2 incomplete dc in this gap to get a 3-dc-bo, ch3, sc in top of the next dc st, ch3, sc in top of the next dc st, ch3, [3-dc-bo in the next gap, ch3, sc in the next dc st, ch3, sc in the next dc st, ch3] repeat 4 times, sl st to the first bo st, fasten off.
Step by step Step by step: Mark the gap (the one close to round 1) between two petals with a darning needle. Join new yarn in this gap, make ch2 as a standing st (count as incomplete dc). Another 2 incomplete dc in the same gap to get a 3-dc-bo. ch3. How to make the 3 double crochet bobble stitch (3-dc-bo): this bobble stitch is based on 3 incomplete dc. First, make the first incomplete dc — yo, insert the hook into the gap, yo and pull up a loop, yo and pull through 2 loops to complete the first incomplete dc, and now you have 2 loops on the hook. [yo, insert hook in the same gap, yo and pull up a loop, yo and pull through 2 loops] repeat 2 times; once finished, there are 4 loops on your hook. Finally, yo and pull through all 4 loops to finish the 3-dc-bo stitch. sc in top of the dc st, ch3. sc in top of the next dc st, ch3. [3-dc-bo in the next gap between two petals, ch3, sc in the next dc st, ch3, sc in the next dc st, ch3] repeat 4 times, sl st to the first bo st, fasten off. Round 4 finished.
- Round 5Add new yarn in any ch-sp, ch as a standing st, 3sc hdc in the same ch-sp, 2hdc dc tr in the next ch-sp, tr ch3 2tr dc, 3hdc sc, 2sc 2hdc, hdc dc 2tr in the following 3 ch-sp, ch3, 2tr dc hdc, 2hdc 2sc, sc 3hdc, dc 2tr ch3 tr, tr dc 2hdc, hdc 3sc, 3hdc dc, 2tr ch3 2tr, dc 3hdc in the following 9 ch-sp. Sl st to the first sc.Step by step Step by step: Add new yarn in any ch-sp, ch as a standing st. 3sc hdc in the same ch-sp, 2hdc dc tr in the next ch-sp, tr ch3 2tr dc, 3hdc sc, 2sc 2hdc, hdc dc 2tr in the following 3 ch-sp, ch3, 2tr dc hdc, 2hdc 2sc, sc 3hdc, dc 2tr ch3 tr, tr dc 2hdc, hdc 3sc, 3hdc dc, 2tr ch3 2tr, dc 3hdc in the following 9 ch-sp. Sl st to the first sc. Round 5 finished.
- Round 6ch as a standing st, invisible standing st in the same st (count as dc), dc in the following 8 sts, 2tr ch3 2tr in the corner space, dc in the following 6 sts, [dc in the following 9 sts, 2tr ch3 2tr in the corner space, dc in the following 6 sts] repeat 3 times, sl st to the top of the invisible standing st.
Step by step Step by step: Make ch as a standing st for the following invisible standing st. sc in the same st. Insert your hook into the left post of the previous sc to complete the second sc. This is an invisible standing st (count as 1dc). dc in the next st. dc in the following 7 sts. 2tr ch3 2tr in the next corner space. dc in the following 6 sts. [dc in the following 9 sts, 2tr ch3 2tr in the corner space, dc in the following 6 sts] repeat 3 times, sl st to the top of the invisible standing st. Round 6 finished.
- Round 7ch as a standing st, sc in the same st, sc in the following 10 sts, 3sc in the corner space, sc in the following 8 sts, [sc in the following 11 sts, 3sc in the next corner space, sc in the following 8 sts] repeat 3 times, sl st to the first sc, fasten off.Step by step Step by step: Make ch as a standing st. sc in the same st. sc in the following 10 sts. 3sc in the corner space. sc in the following 8 sts. [sc in the following 11 sts, 3sc in the next corner space, sc in the following 8 sts] repeat 3 times, sl st to the first sc, fasten off. Round 7 finished.
Important notes
💡 Gauge / finished size: the finished cherry blossom granny square is about 4.33 × 4.33 inches worked with the 3.00mm hook. Block before measuring or joining so all your squares match
💡 The sample uses a 3.00mm hook for a firm, tidy square. Going up to 3.5mm or 4mm gives a softer, larger, more drapey block — great for blankets — while staying at 3.00mm keeps coasters crisp
💡 This is a 4-color pattern, so wind small bobbins or pull short working lengths for each color to keep your yarn from tangling as you swap between the center, petals, and border
💡 Drop a stitch marker into the first sc or standing stitch of each round. With multiple color joins, that marker is the quickest way to find where the round begins and where to sl st closed
💡 Weave in your tails with the darning needle as you go rather than saving them all for the end — four color changes means a lot of ends, and burying them early keeps the back neat for joining
💡 Block the finished square before measuring or joining. A light spray- or wet-block opens up the chain-space petals and settles it to the intended ~4.33 × 4.33 inches so all your squares match
💡 For a blanket, keep every square's tension identical — same hook, same yarn weight, same person if you can. Consistent squares join far more smoothly and lie flatter across a big project
More photos
FAQ
How big is one cherry blossom granny square?
A single square finishes at about 4.33 × 4.33 inches with the recommended 3.00mm hook and a DK-weight yarn. You can make it larger by adding dc-and-chain rounds after Round 7, or smaller by using a finer yarn and thinner hook
What yarn and hook should I use?
Any yarn you love works — the pattern is written for 'yarn of your choice' in four colors, worked with a 3.00mm hook, which suits sport to DK weights beautifully. Going up a hook size gives a softer, slightly bigger square that's lovely for blankets
Can I join these squares into a blanket?
Absolutely — that's what they're made for. Once each square is blocked to the same size, join them with a whip stitch, slip stitch, or join-as-you-go on the final round to build blankets, pillows, or table runners
Do I really need four colors?
Four colors give you the classic look: a deep flower center, soft pink petals, and a framing border. You can simplify to two or three colors, or even make a tonal single-color square, and the flower shape will still shine
Is this pattern beginner friendly?
Yes. The magic ring is the only slightly tricky part, and once it's closed you're only working double crochets, chains, single crochets, and simple color joins across the seven rounds. A confident beginner can finish a square in an afternoon
Made your own square?
This site belongs to every crocheter. Share your design with the world — we’ll math-check the counts, polish it up, and publish it free for everyone, credited to you.
🧵 Share your pattern →
0 / 0 rounds