
Free Pattern
Step-by-Step
Crochet
Granny SquaresFolk Flower Medallion Granny Square Pattern
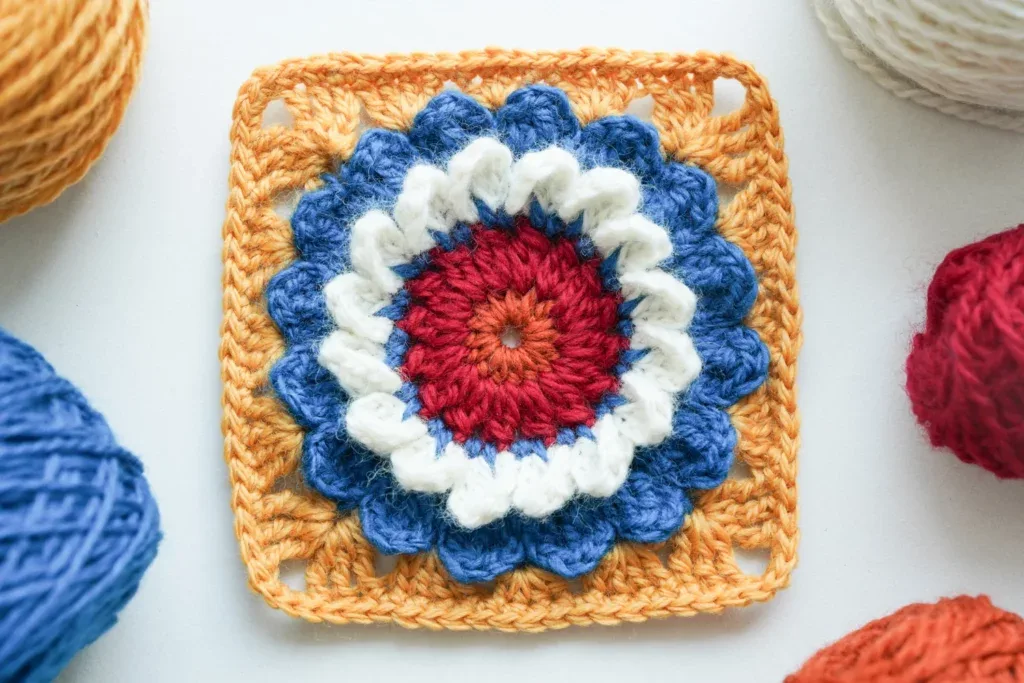
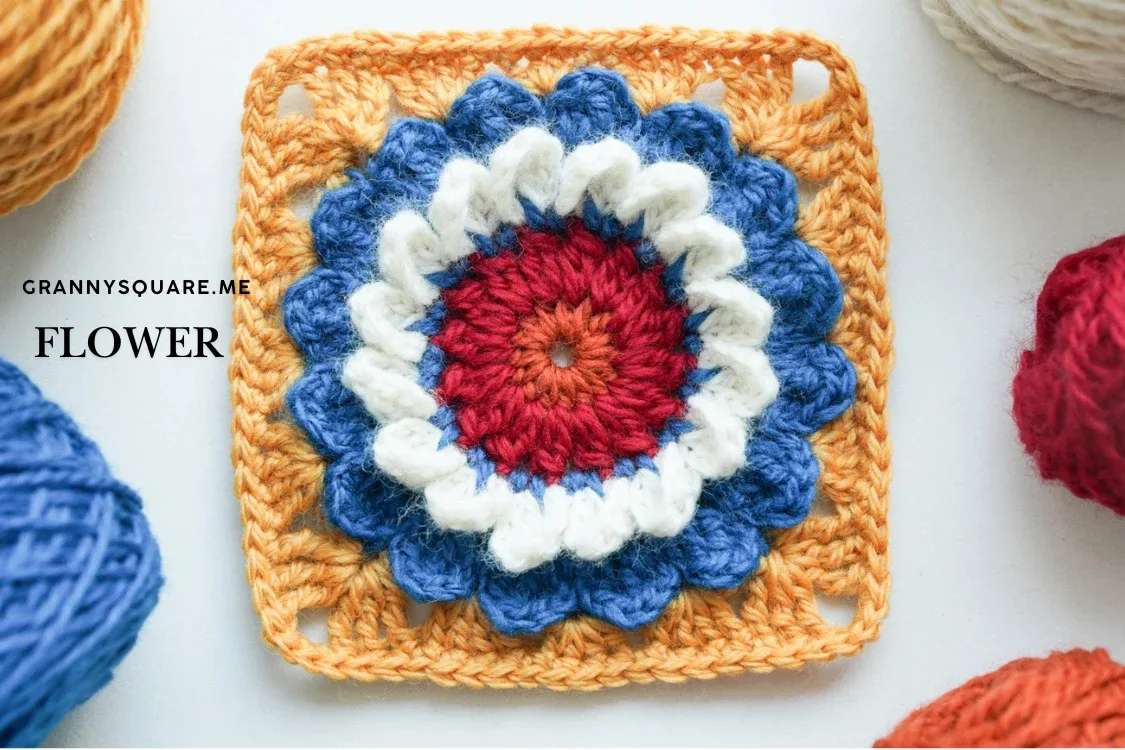
Crochet the Folk Flower Medallion Granny Square with bobbles, dimensional petals, and 5 cheerful colors — a free 4.7-inch square pattern for blankets
Level IntermediateTime 2-3 HoursHook 3.00 mmYarn DK
About This Pattern
The Folk Flower Medallion Granny Square turns a simple chain-5 ring into a blooming, embroidery-style medallion framed by a classic square border. A dense halo of half double crochet forms the flower's center, a ring of sixteen puffy two-double-crochet bobbles creates that unmistakable folk-art dot work, and dimensional white petals lift right off the fabric. It's perfect for crocheters who are a little bored of plain granny squares and want a motif with real personality — whether you're planning a whole blanket or just one beautiful square
This pattern leans on a handful of satisfying techniques: a chain-5 ring start, tidy hdc rounds, standing stitches that replace clunky join-and-chain starts, and 2-dc bobbles worked into the gaps between stitches rather than into the stitches themselves. Because almost every round fastens off for a fresh color, you'll also get plenty of practice joining new yarn cleanly. I'd call it a confident-beginner-to-intermediate make — expect around two to three hours for your first square, and noticeably less once the rhythm clicks
Finished in DK weight yarn on a 3.00 mm hook, each square blocks to approximately 4.72 by 4.72 inches — a lovely, slightly-larger-than-standard motif with gorgeous drape and a wonderfully tactile surface. The bobbles and raised petals beg to be touched, which makes these squares irresistible as pillow fronts, blanket panels, or framed fiber art. A single square makes a sweet coaster-style gift topper, and a stack of them in coordinated colors is the beginning of an heirloom throw someone will keep forever
Variations
The five-color format is where this square becomes endlessly customizable. The designer's own suggestion is one of my favorites: purple and green with yellow bobbles for a pansy-inspired medallion. For something elegant, work navy, burgundy, and gold accents on a cream background — it instantly reads as vintage folk textile. For spring, try soft pink and lavender petals with a mint green border; for autumn, go rust, mustard, and olive with cream bobbles; for a frosty winter set, ice blue, silver-grey, and white on a deep navy frame. Because the dimensional petals are worked in white in the sample, they play nicely with nearly any palette — but flipping them to a color and making the background white gives a completely different, airy look. Size is easy to adjust through yarn weight. The sample in DK on a 3.00 mm hook blocks to about 4.72 inches; the same ten rounds in worsted (think Stylecraft Special Aran or Soft) on a 4.00 mm hook lands closer to 6 inches, while sport weight on a 2.50 mm hook shrinks it to roughly 4 inches for delicate projects. To grow a square without changing yarn, simply add one more granny-style round — (3 dc, ch 1) in each side gap with (3 dc, ch 2, 3 dc) corners — which adds about three-quarters of an inch per round. For yarn, Paintbox Simply DK and Scheepjes Colour Crafter offer huge matching palettes for multi-square blankets, and mercerized cotton like Scheepjes Catania turns these into sturdy, heat-friendly trivets and potholders with extra-crisp bobble definition
I have made a lot of granny squares in my time, and this one genuinely made me grin at my hook. The moment that gets me every single time is Round 3 — joining fresh yarn into the gap between two hdc and watching those sixteen little 2-dc bobbles pop up in a perfect halo around the center. It looks like folk embroidery, but it's all crochet. I also love that this pattern uses standing stitches instead of the usual slip-stitch-and-chain shuffle, so every color change starts invisibly — your finished medallion has no obvious seam line anywhere. The dimensional petals are the showstopper: they sit up off the square like a real pressed flower, and in white against five saturated colors they absolutely glow. And because each round fastens off, this is a dream scrap-buster — I raided my DK leftovers bin and every square came out looking intentional. Ten rounds, constant little payoffs, and a square that photographs like it took twice as long as it did. That's my kind of pattern
Common mistakes
- Completing each double crochet of the 2-dc bobble instead of leaving it incomplete, which produces a flat cluster with no pop
- every 2-dc-bo, work each dc only until two loops remain on your hook, keep them there, then yarn over and pull through all loops at once to close both stitches together. That final joint pull-through is what compresses the stitches into a raised bobble — and giving the working yarn a gentle tug afterward pushes it toward the right side of the square
- Working the bobbles into the top of an hdc stitch instead of into the gap between two hdc
- Round 3 specifically says to join and work in the space between stitches. Tilt your work and slide your hook into the little vertical gap between two hdc posts — not under the top V of a stitch. Working in the gaps lets the sixteen bobbles nest down between the hdc and space themselves evenly around the medallion
- Losing count in the hdc round because the starting ch-2 wasn't treated as a stitch
- The ch-2 counts as your first hdc, so Round 2 is the ch-2 plus 15 hdc for 16 stitches total. Drop a stitch marker into the top chain of that ch-2 the moment you make it — it's where your closing slip stitch goes, and it keeps you from accidentally crowding in a 17th stitch, which would throw off the sixteen bobble gaps in the next round
- Starting fastened-off rounds with a sloppy join so a visible knot or color blip appears at every round change
- This pattern uses standing stitches for a reason. Put a slip knot on your hook first, then work your ch-2 or standing stitch directly into the correct gap — no slip-stitch-then-chain shuffle. When you close the round into the top of that standing stitch, the join disappears completely and each color ring looks unbroken
- Chaining the ch-1 between bobbles too tightly, causing the medallion to cup like a bowl
- Those ch-1 spaces are the breathing room that lets sixteen bobbles lie flat in a circle. Keep them relaxed — even slightly loose — and check that your work sits flat on the table after the bobble round. If it's still cupping, go up to a 3.25 mm hook for that round or wet-block the finished square out to its 4.72-inch measurement
- Leaving all the yarn ends until the very end, then facing a bird's nest of ten-plus tails
- a fasten-off in nearly every round and five colors in play, ends multiply fast. Cut 6-inch tails, and weave each one with your darning needle as soon as its round is done — under the bobble bumps and through same-color stitches where they vanish. Two minutes per round beats a painful half hour at the end, and it keeps tails from tangling into your working yarn


Intermediate
Materials
- yarn of your choice- 5 colors, the sample is made with DK sports
- Crochet Hook, we used a 3.00 mm crochet hook
- Darning Needle
- Scissors
Main Pattern
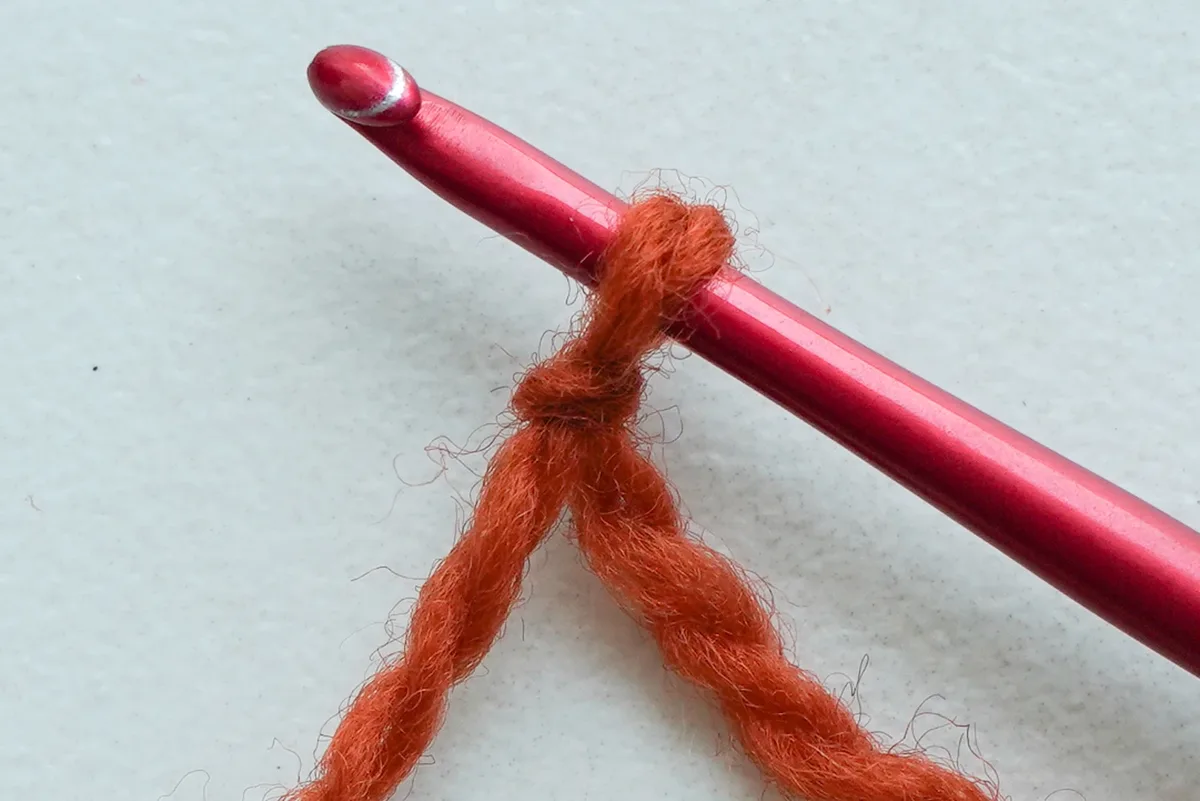
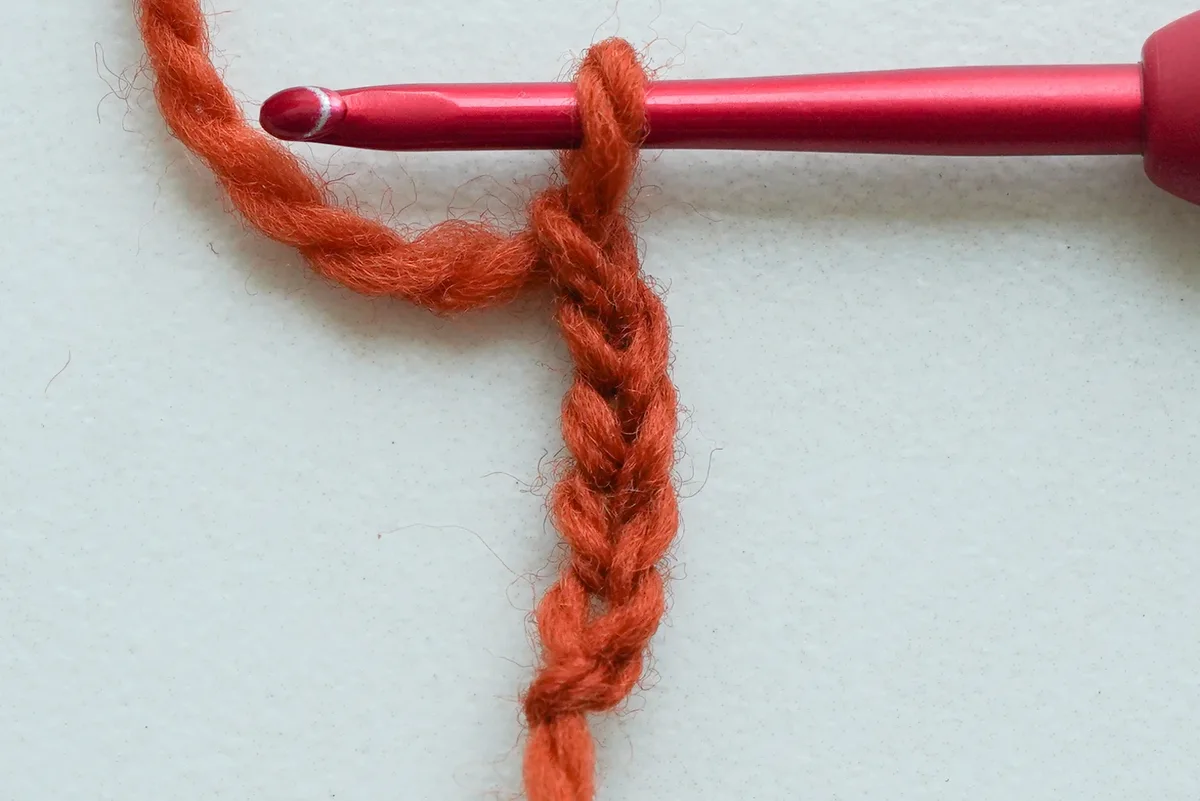
- Round 1ch5, sl st to the first ch.
- Round 2Flower Center ch2(count as hdc), 15hdc in the loop, sl st to the top of first ch2, fasten off.
- Round 3New yarn in gap between any two hdc, ch2(count as incomplete dc)+another incomplete dc to get a 2-dc-bo, ch1; [2-dc-bo ch1 in next gap] repeat 15 times, sl st to the top of first bo, fasten off.
- Round 4New yarn in any ch-1 sp, ch1+sc+ch1, [sc+ch1 in next ch-1 sp] repeat 15 times, sl st to the first sc, fasten off (16).(16)
- Round 5First Layer of Petal New yarn in any ch-sp, ch3+2tr+ch3, sl st to the same ch-sp; Remove your hook, insert it into the same ch-sp from the wrong side to the right side (back to front) , grab the loop, pull it through to truly complete the first sl st .ch2Remove your hook again and insert it into next ch-sp as usual, grab the loop, and pull it up to finish the second sl st .Use the same method for the remaining sl st in this round.[ch3+2tr+ch3 in this ch-sp, sl st to the same ch-sp, ch2, sl st to next ch-sp] repeat 15 times, (for the last sl st, join it to the third loop of the 1st ch in the initial ch3) , fasten off.
- Round 6Insert hook through space between any 2 tr from round 5 (from back to front) AND into top loops of bo directly below (from round 3), attach new yarn, ch5, sl st to the ch-2 sp from round 5, ch5;[sl st to next bo from round 3(making your hook through the 2 tr gap from round 5 like before), ch5, sl st to ch-2 sp from round 5, ch5] repeat 15 times, sl st to the 1st ch of the first ch5, fasten off.
- Round 7Second layer of Petal New yarn in 2nd ch-5 sp of any repeat from round 6, ch2+dc+tr, tr+dc+ch2 in next ch-5 sp, sl st to the same ch-sp;[sl st to next ch-5 sp, ch2+dc+tr, tr+dc+ch2 in next ch-5 sp, sl st to the same ch-sp] repeat 15 times, sl st to next ch-sp, fasten off.
- Round 8Turn Into Square Third loop(tl) only . New yarn in 2nd ch of any petal, ch3, sl st to next ch of this petal, ch1 , *sl st to 2nd ch of next petal , ch3, sl st to next ch , ch1* repeat 2 times, sl st to 2nd ch of next petal, ch3, sl st to next ch, ch3 .[*sl st to 2nd ch of next petal , ch3, sl st to next ch , ch1 * repeat 3 times, sl st to 2nd ch of next petal , ch3, sl st to next ch, ch3 ] repeat 3 times, join to the 1st ch of the first ch3, fasten off.
- Round 9First Border New yarn in any ch-3 sp, ch4(count as tr)+2tr+ch2+3dc, 4dc in next space between two petals, 4hdc in next space, 4dc in next space; [3tr+ch2+3dc in next ch-3 sp, 4dc, 4hdc, 4dc] repeat 3 times, sl st to the top of ch4.
- Round 10Second Border ch1+sc, sc in each st, 3sc in each corner sp, sl st to the first sc, fasten off.
Important notes
💡 The sample uses DK weight yarn and a 3.00 mm hook, which is snugger than the hook most DK ball bands suggest — that firmness is deliberate, so the bobbles and petals hold their shape. Check your square against the 4.72-inch finished measurement after the border rounds and adjust hook size rather than fighting your tension
💡 Place a stitch marker in the top chain of every starting ch-2 the moment you make it. Almost every round in this pattern closes with a slip stitch to that exact spot, and the marker saves you from hunting for it in a crowded medallion center
💡 Lay out your five colors in round order before you start, and wind off small bobbins if you're making multiple squares. Since each round fastens off, you can even work assembly-line style — all the centers first, then all the bobble rounds — which keeps colors consistent across a blanket's worth of squares
💡 The center ring is a chain-5 loop, not a magic ring, so it can't be cinched closed afterward. Work your Round 2 hdc snugly and push them together as you go so the center hole stays small and tidy, and use the starting tail to close any remaining gap from the back
💡 When you join new yarn between two hdc for the bobble round, insert your hook from front to back through the gap itself. Take a second to confirm you're between two posts and not splitting a stitch — your first bobble position determines the spacing of all sixteen
💡 Wet-block your finished squares before joining them. Pin each one out to 4.72 by 4.72 inches while damp, but don't flatten the flower — pin only the outer border and let the bobbles and dimensional petals stand proud while the square edges dry crisp and true
More photos
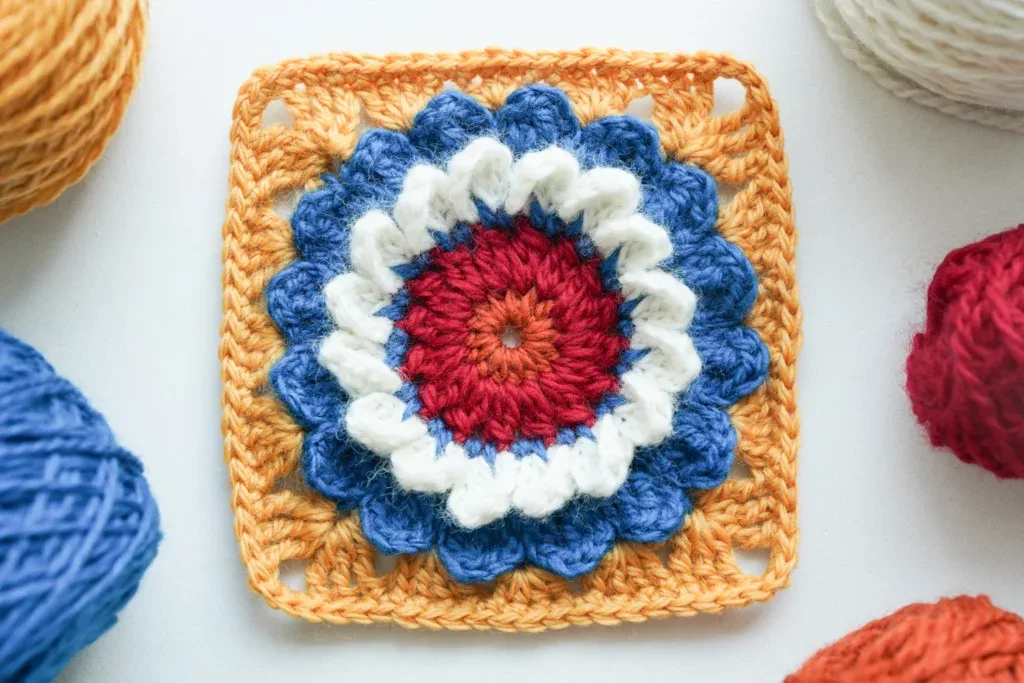
FAQ
Can I make this square in worsted weight yarn instead of DK?
Absolutely — the stitch pattern works in any weight. In worsted with a 4.00 mm hook, expect the square to finish closer to 6 inches instead of 4.72, so keep all your blanket squares in the same yarn weight so they match when joined
What does 2-dc-bo mean in this pattern?
It's a two-double-crochet bobble: you work two double crochets in the same gap, leaving the last loop of each on your hook, then yarn over and pull through all the loops at once. That shared closing pull is what makes the stitch pop forward into a little bead of texture
How many squares would I need for a blanket, and how do I join them?
roughly 4.72 inches per square, a 7-by-7 layout of 49 squares gives you about a 33-inch baby blanket before the border, and 8 by 10 makes a generous lap throw. Whip stitch or slip stitch through back loops both work beautifully, and join-as-you-go on the final round saves seaming time
Do I really have to fasten off after every round?
The frequent fasten-offs are built in so each round can be a fresh color — it's what creates the folk medallion look. If you'd rather use fewer colors, you can carry the same yarn across neighboring rounds and skip some cuts, though you'll still need to fasten off wherever the pattern moves the starting point to a gap
My medallion is cupping and won't lie flat — what went wrong?
Cupping in the bobble round almost always means your ch-1 spaces between bobbles are too tight. Loosen those chains or go up a quarter hook size for that round, and wet-block the finished square to its 4.72-inch measurement — blocking relaxes minor cupping completely
Made your own square?
This site belongs to every crocheter. Share your design with the world — we’ll math-check the counts, polish it up, and publish it free for everyone, credited to you.
🧵 Share your pattern →
0 / 0 rounds