
Free Pattern
Step-by-Step
Crochet
Granny SquaresLayered Flower Granny Square – Free Crochet Pattern
Crochet a stunning layered flower granny square with this free pattern. Learn magic ring, back-loop treble petals, ch-1 picot tips, and a granny border for dimensional blooms
Level IntermediateTime 1-2 HoursYarn Worsted
About This Pattern
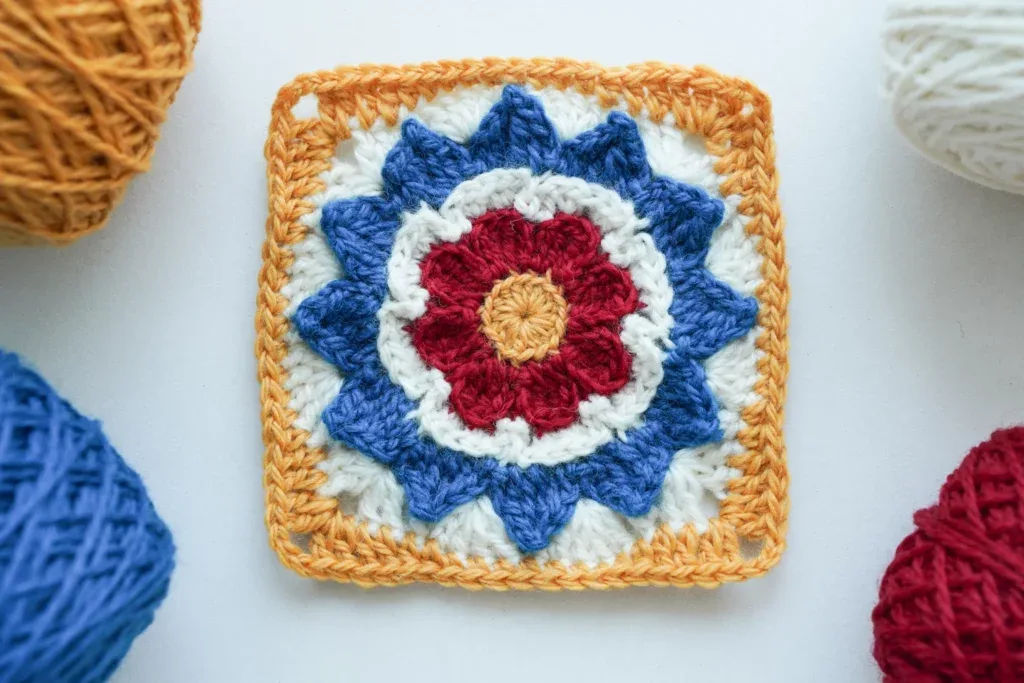
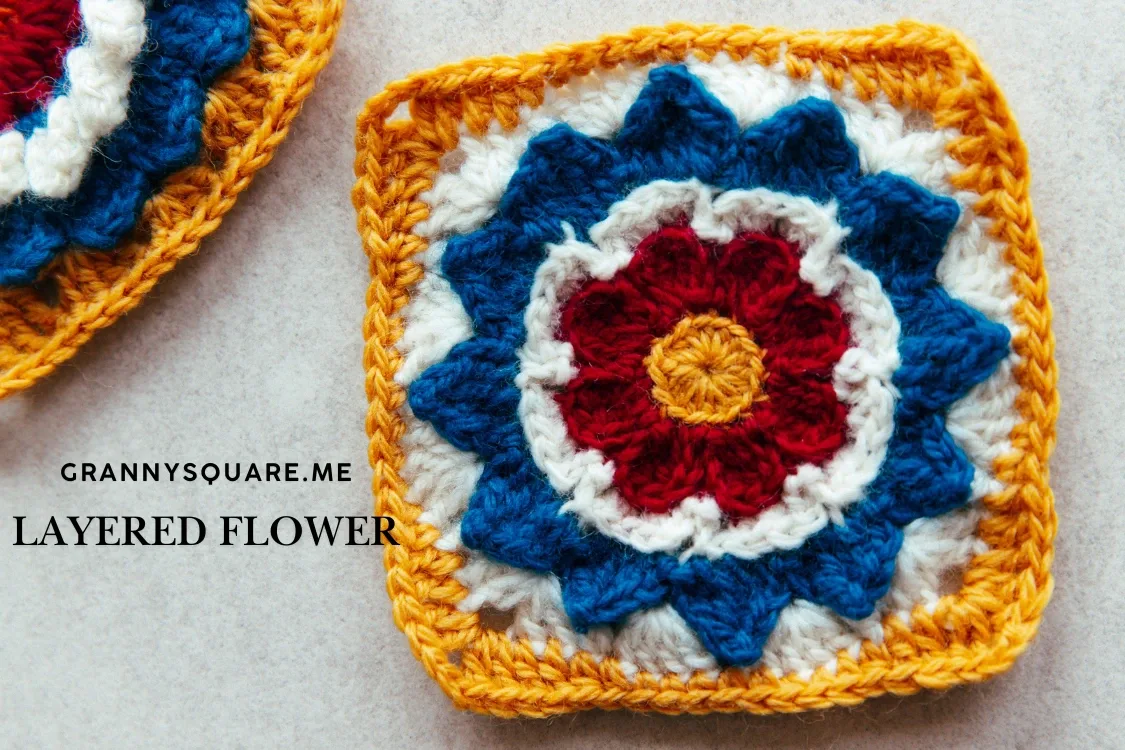
This Layered Flower Granny Square turns four colors of yarn into a raised, three-dimensional bloom that sits proudly on top of a classic square base. Instead of a flat motif, the petals actually lift off the surface thanks to clever back-loop and third-loop work, giving the whole square real depth and texture. It's perfect for anyone who loves granny squares but wants something with a little more wow — ideal for statement blankets, tote bag panels, cushion fronts, or a single framed motif that shows off your color sense
You'll be working with a small handful of intermediate-friendly techniques: a magic ring to start, half double crochet for a tidy center round, back-loop-only stitching to build the raised layers, treble crochet clusters (ch3 + tr, tr + ch3) for the inner petals, and a simple ch-1 picot to tip the blue outer petals — it looks fancy but it's really just a chain-1-slip-stitch. The layers finish with a soft white lattice and a granny-style border, so the repeats stay short and rhythmic once you settle in. If you can hold your tension and count to fifteen, you're ready for this one
The finished square is soft, structured, and genuinely eye-catching, measuring approximately 4.53 inches by 4.53 inches when worked as written — expect a tidy motif that blocks out beautifully flat while the petals stay lifted. In person it feels plush and sculptural, with each color layer popping against the next. Stitch a stack of them into a throw, or make just one as a coaster, appliqué, or handmade card topper. It's the kind of make people pick up and turn over in their hands
Variations
The four-color layout is where you get to have all the fun. For a sophisticated look, I love navy blue petals with a burgundy center and a cream middle ring, then a soft charcoal border to frame it. Craving warmth? Try coral petals, a golden-yellow center, and peachy accents with a terracotta edge — pure sunset. Ocean lovers can pair teal petals around a sandy center for a beachy, calming motif. The trick is strong contrast between neighboring layers so each flower ring pops distinctly. For yarn, a smooth worsted keeps the treble petals crisp; a cotton gives sharper stitch definition for coasters and market bags. Want a bigger square? Add a plain granny border round after the flower — work 3 dc, ch, 3 dc clusters into each side, ch2 at the corners — and repeat for as many rounds as you need to hit your target size; each added round grows the motif by roughly the height of a dc row. To shrink it, drop to a smaller hook and a DK-weight yarn and the same seven rounds will finish noticeably smaller. Themed versions are easy too: pastel petals with a white center for spring, or tonal monochrome (four shades of one color) for a modern, grown-up throw. Make a whole rainbow batch and join them for a heirloom flower blanket
Common mistakes
- Miscounting the first round because the
- Remember the ch2 IS your first hdc, so you only add 14 more hdc into the ring for 15 stitches total. Count them before you slip stitch to the top of the ch2 — an extra or missing stitch here throws off every petal above it
- Working the petal round through both
- The raised, layered effect depends entirely on joining and stitching in the back loops. Working both loops flattens the flower. Deliberately push the front loop forward and insert your hook only into the back loop of each stitch on that round
- Pulling the treble (tr) stitches too
- The ch3 + tr and tr + ch3 clusters need a little airiness to form open, lifted petals. Keep your yarn-overs relaxed and don't yank after each pull-through. If petals look cramped, go up half a hook size for the flower rounds
- Cinching the slip stitches between
- That sl st to the stitch after each cluster anchors the petal, but pull it snug — not strangled. A too-tight join makes it hard to fit your hook in for the next 'sl st to the next st, ch3 + tr' repeat and puckers the round. Aim for a firm but easy-to-work loop
- Forgetting the picot is just a ch1 into
- the blue round the tr+ch-1 pic+tr can look intimidating, but the picot is simply: after the first tr, work ch1, insert your hook into the third loop of that chain, and sl st to close. Don't skip it — those picots are what give the outer petals their pointed, textured tips
- Leaving all four color-change tails
- four colors you fasten off multiple times, so you'll have several tails. Leave at least 6 inches at each fasten-off and weave ends in as you finish each color, following the direction of the stitches on the wrong side so they lock in and won't peek through between the raised layers


Intermediate
Materials
- Yarn of your choice- 4 colors
- Crochet hook
- Darning Needle
- Scissors
Main Pattern
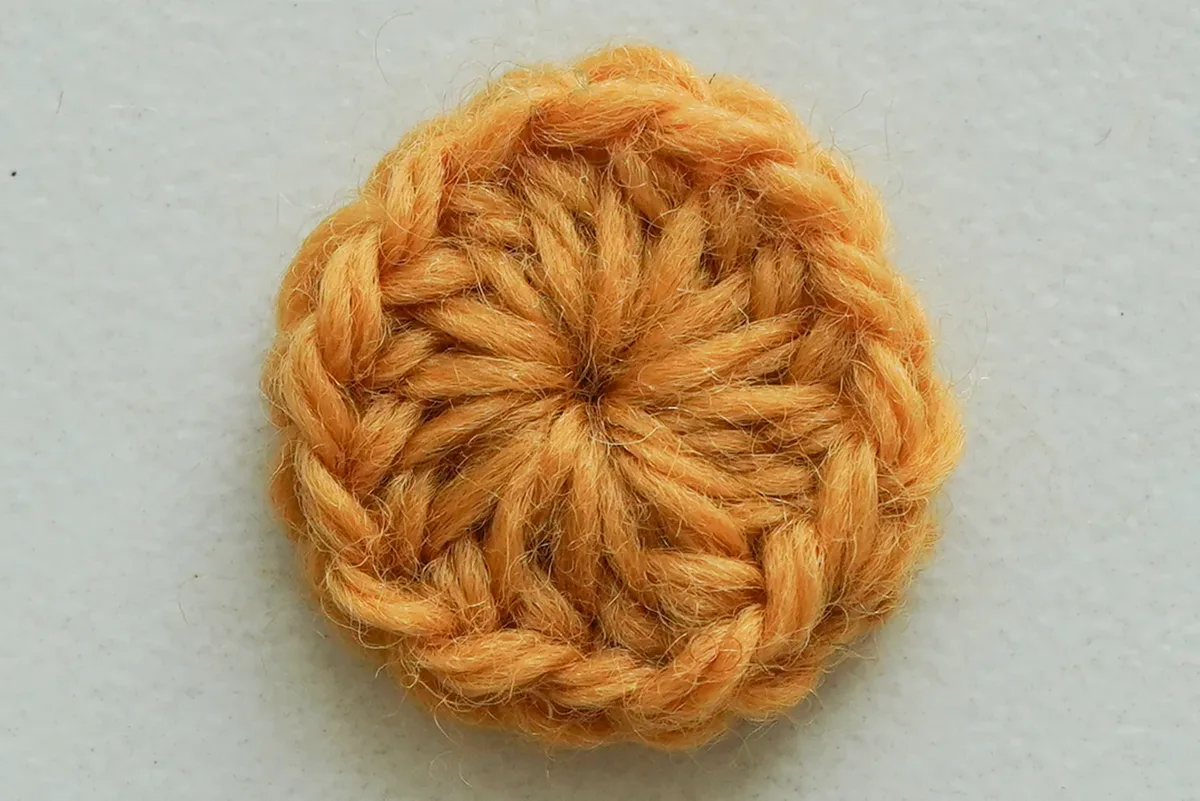
- Round 1magic ring, ch2(count as hdc), 15hdc, sl st to the top of the first ch2, fasten off, round 1 finished (16).Step by step Start with a magic ring. ch2 as a standing st(count as hdc). hdc in the loop. 14hdc in the loop, sl st to the top of the first ch2, fasten off, round 1 finished. (16)
- Round 2BLO for this round. Add red yarn in the BL of any st, ch3+tr in this st, tr+ch3 in next st, sl st to this st, *sl st to the next st, ch3+tr in this st, tr+ch3 in next st, sl st to this st*rep 7 times, sl st to next st, fasten off.Step by step BLO for this round. Add red yarn in the back loop(BL) of any st. ch3+tr in this st, tr+ch3 in next st, sl st to this st. *sl st to the next st, ch3+tr in this st, tr+ch3 in next st, sl st to this st* rep 7 times, sl st to next st, fasten off, round 2 finished.
- Round 3Third loop only for this round. Choose a petal, join white yarn in the 3rd ch of the first ch3, ch3, 2 hdc inc, ch3, sl st to the top of the next ch3, *sl st to the top of the next ch3, ch3, 2 hdc inc, ch3, sl st to the top of the next ch3* rep 7 times, then, sl st to the first loop where you initially joined the yarn, fasten off.Step by step Third loop only for this round. Choose a petal, join white yarn in the 3rd ch of the first ch3. ch3, 2 hdc inc, ch3, sl st to the top of next ch3. *sl st to the top of the next ch3, ch3, 2 hdc inc, ch3, sl st to the top of the next ch3* rep 7 times, then, sl st to the first loop where you initially joined the yarn, fasten off. How to make a ch-1 picot Before making the picot (after making the first tr), work ch1, insert the hook into the third loop of this ch, then make a sl st to complete a picot. Round 4 Third loop only for this round, and work in each st around, including the 3rd ch of each ch-3 group(count as a st).
- Round 4Add blue yarn in any st, ch2 +dc in this st, tr+ch-1 pic+tr in next st, dc+ch2 in next st, sl st to this st, *sk1, sl st to next st, ch2 +dc in this st, tr+ch-1 pic+tr in next st, dc+ch2 in next st, sl st to this st, sk1*rep 11 times, sl st to the first loop where you initially joined the yarn, fasten off.
Step by step Third loop only for this round, and work in each st around, including the 3rd ch of each ch-3 group(count as a st). Add blue yarn in any st. ch2 +dc in this st, tr+ch-1 pic+tr in next st, dc+ch2 in next st, sl st to this st. *sk1, sl st to next st, ch2 +dc in this st, tr+ch-1 pic+tr in next st, dc+ch2 in next st, sl st to this st*rep 11 times, sl st to the first loop where you initially joined the yarn, fasten off.
- Round 5Third loop only for this round. Working to the right of any petal, add white yarn into the 2nd ch of this ch2, ch4, sl st to the top of the ch2 on the left side, ch, sl st to the top of the ch2 of the next petal, *ch4, sl st to the top of the next ch2, ch, sl st to the top of the next ch2 of the next petal* rep 11 times, fasten off.Step by step Third loop only for this round. Working to the right of any petal, add white yarn into the 2nd ch of this ch2. ch4, sl st to the top of the ch2 on the left side, ch, sl st to the top of the ch2 of the next petal. *ch4, sl st to the top of the next ch2, ch, sl st to the top of the next ch2 of the next petal* rep 11 times, fasten off.
- Round 6add white yarn in ch-1 sp between any two petals, ch3 as a standing st(count as dc), 3dc in this ch-1 sp, sc in the tl of next pic, 4dc in next ch-1 sp, hdc in the tl of next pic, 2dc+ch3+2dc in next ch-1 sp, hdc in the tl of next pic. *4dc in next ch-1 sp, sc in the tl of next pic, 4dc in next ch-1 sp, hdc in the tl of next pic, 2dc+ch3+2dc in next ch-1 sp, hdc in the tl of next pic*rep 3 times, sl st to the top of the first ch3, fasten off.
Step by step add white yarn in ch-1 sp between any two petals. ch3 as a standing st(count as dc), 3dc in this ch-1 sp, sc in the tl of next pic, 4dc in next ch-1 sp, hdc in the tl of next pic, 2dc+ch3+2dc in next ch-1 sp, hdc in the tl of next pic. *4dc in next ch-1 sp, sc in the tl of next pic, 4dc in next ch-1 sp, hdc in the tl of next pic, 2dc+ch3+2dc in next ch-1 sp, hdc in the tl of next pic*rep 3 times, sl st to the top of the first ch3, fasten off.
- Round 7add yellow yarn in any corner sp, ch3(count as dc), dc+ch3+2dc in this corner sp, 2dc, 2hdc, 7sc, 2hdc, 2dc, *2dc+ch3+2dc in next corner sp, 2dc, 2hdc, 7sc, 2hdc, 2dc*rep 3 times, sl st to the top of the first ch3, fasten off.Step by step add yellow yarn in any corner sp. ch3 as a standing st(count as dc), dc+ch3+2dc in this corner sp, 2dc, 2hdc, 7sc, 2hdc, 2dc. *2dc+ch3+2dc in next corner sp, 2dc, 2hdc, 7sc, 2hdc, 2dc*rep 3 times, sl st to the top of the first ch3, fasten off.
Important notes
📏 The finished layered flower granny square measures approximately 4.53 inches by 4.53 inches. Crochet one square first and measure it before planning how many you'll need for a larger project
💡 A 4.0–5.0 mm hook suits most worsted/aran yarns here — go up half a size just for the treble petal rounds if you want the flowers to stand up even more dramatically
💡 Pull your magic ring closed firmly after completing the 15 hdc; a loose center leaves a hole that shows straight through the middle of your flower
💡 Drop a stitch marker in the top of the starting ch2 on each round so you can always find the true beginning and end when you slip stitch to close
💡 Because you're changing colors every layer, wind small bobbins or pull-skeins of your four colors ahead of time — it keeps tails short, tangles down, and color joins tidy
💡 On the BLO petal round, physically fold the front loops toward you so you can clearly see and enter only the back loops; this is what creates the raised, layered flower
💡 Block the finished square with a light steam or wet-block, pinning the base flat while leaving the petals free — the square evens out and squares up while the flower keeps its lift
More photos
FAQ
What does 'BLO' mean and why does this pattern use it?
BLO stands for 'back loop only,' meaning you insert your hook into just the back loop of each stitch rather than both loops. This pattern uses it on the flower rounds so the petals lift up off the base, creating the signature layered, three-dimensional bloom
How many colors do I really need for the layered flower square?
The pattern is written for four colors so each layer contrasts with the next and every petal ring stands out. You can absolutely use fewer — even two colors looks lovely — but strong contrast between neighboring layers gives you the boldest, most dimensional flower
What size will my finished square be?
Worked as written the finished square measures approximately 4.53 inches by 4.53 inches, though your exact size depends on your yarn weight and hook. With a worsted/aran yarn and a 4.5–5.0 mm hook you'll get that tidy small-to-medium motif; a DK yarn and smaller hook makes it noticeably smaller. Make one square first, measure it, then plan how many you need for your project
Why does my first round have an odd stitch count?
Round 1 has 15 hdc, and the starting ch2 counts as the first one — so you chain 2, then work 14 more hdc into the magic ring. If you accidentally add a 15th hdc after the ch2, you'll end up with 16 and the petals above won't space evenly
Is the picot stitch hard to make?
Not at all — it's just a chain-1-slip-stitch. On the blue outer-petal round, after the first tr you work ch1, insert your hook into the third loop of that chain, and sl st to close. It looks intricate but takes seconds, and it gives the outer petals their pointed, textured tips
Made your own square?
This site belongs to every crocheter. Share your design with the world — we’ll math-check the counts, polish it up, and publish it free for everyone, credited to you.
🧵 Share your pattern →
0 / 0 rounds