
Free Pattern
Step-by-Step
Crochet
Granny SquaresMushroom Granny Square Crochet Pattern (Free 4-Round Motif)
Crochet a mushroom granny square with a red cap, white stem, and grassy border. Free 4-round pattern with color-change tips and creative variations
Level IntermediateTime 1-2 HoursHook 5.00 mmYarn DK
About This Pattern
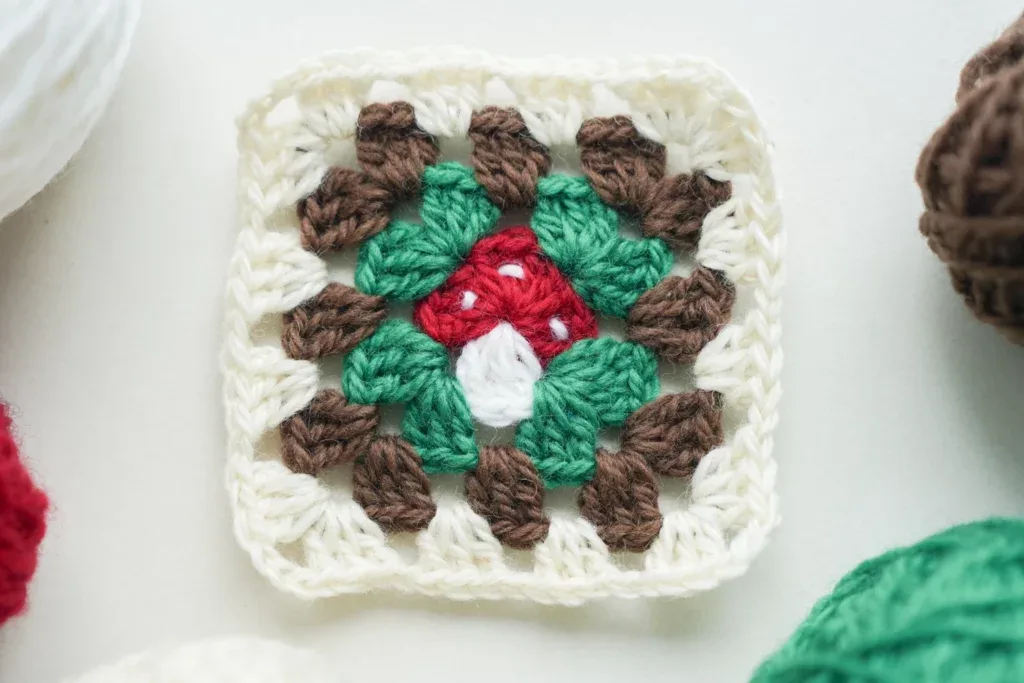
This pattern turns the humble basic granny square into a tiny piece of woodland art: a red-capped mushroom with a crisp white stem, standing on green grass, edged in earthy brown, and framed in soft cream. Everything happens within four clever rounds, so there is no complicated colorwork chart to follow — the picture builds itself as you crochet. It's perfect for cottagecore lovers, scrap-yarn hoarders, and anyone assembling a nature-themed blanket who wants one motif that instantly steals the show
The magic sits in round one, where ten red double crochets fan out to form the mushroom cap while three white stitches tucked into the same magic loop become the stem. From there you'll use standing chain-3 starts, per-round color changes with clean fasten-offs, and classic 3dc + ch3 + 3dc corner groups — two of which are worked into chain-1 spaces rather than stitches. If you're at ease with basic granny construction, call it a confident-beginner-to-intermediate make and expect one to two unhurried hours per square
Finished in DK or sport-weight yarn with a 5.00 mm hook, each square measures roughly 3.35 by 3.35 inches — the sweet spot for blankets, pillow fronts, tote panels, and mug rugs. The fabric is dense enough to hold its shape yet still soft and squishy, and the little toadstool pops beautifully against the grassy round that frames it. Stitch a dozen and you have a forest; gift a coordinated set and you've just handed someone their new favorite thing
Variations
I have a soft spot for granny squares that hide a picture inside them, and this mushroom is my favorite kind of clever. The whole portrait happens in round one: ten red double crochets become the cap while three white stitches slipped into the same magic loop become the stem — no bobbins, no tapestry chart, no counting rows of a graph. Then the pattern does something quietly brilliant: you join the round-two yarn in the fourth dc, which rotates the corner placement so the stem lands exactly at the bottom edge of the square. Because every round fastens off, the color changes stay razor-sharp with no floats stranding across the back. I also love that it's built on the standard granny framework — 3dc + ch3 + 3dc corners with ch-1 spaces between — so it sits flush beside every plain square already in your basket. One square is a satisfying evening pick-me-up; a whole stack turns into a forest, and I find that completely irresistible
Common mistakes
- Leaving the magic loop loose before
- After working the ch3, 9 red dc, and 3 white dc into the loop, pull the yarn tail firmly until the center closes completely, then slip stitch to the top of the ch3. Weave the tail back and forth in a zigzag on the wrong side so the ring can't creep open with washing
- Forgetting that the standing ch3 counts
- Round 1 should total 13 dc: the ch3 plus 9 red dc for the cap, and 3 white dc for the stem. If you count the ch3 as 'nothing' you'll add an extra stitch, and the crucial 'join in the 4th dc' instruction for round 2 will land in the wrong place. Count the ch3 as stitch number one, always
- Joining the round-2 yarn in the wrong
- Count carefully from the top of the ch3 (which is dc #1) and join the new yarn in the 4th dc. This placement is what rotates the square so the white stem sits at the bottom edge. Pop a stitch marker in that 4th dc before you fasten off round 1 so there's no guesswork later
- Working the 3rd and 4th corner groups
- The pattern notes that those two corner groups belong in the chain spaces from round 1 — that's how 13 stitches stretch into 4 even corners. If you run out of stitches partway around or the square skews into a diamond, pull back to the second corner and re-read: groups three and four go in the ch-sp, not into a dc
- Skipping the wrong number of stitches between corner groups
- The repeat is 'sk3, then 3dc + ch3 + 3dc + ch1 in the next stitch.' Skipping only 2 crowds the corners and makes the edges ruffle; skipping 4 pulls the square tight and cups it. Count the three skipped stitches out loud — on a 13-stitch round there's no slack to absorb an error
- Muddling the double chain-1 at each
- The sequence is deliberate: ch1 with the old color, then ch1 with the new color before its first stitch. Both chains are needed — one closes out the old section, one anchors the new yarn. Snug the old-color tail before working the new ch1 so the join stays tidy, and hold both tails along the top of the round for a few stitches


Intermediate
Materials
- Yarn of your choice – 4 colors, representing the mushroom cap, white stem, green grass, and brown earth
- Crochet hook (5.00 mm for the stated 3.35-inch finished size)
- Darning Needle
- Scissors
Main Pattern
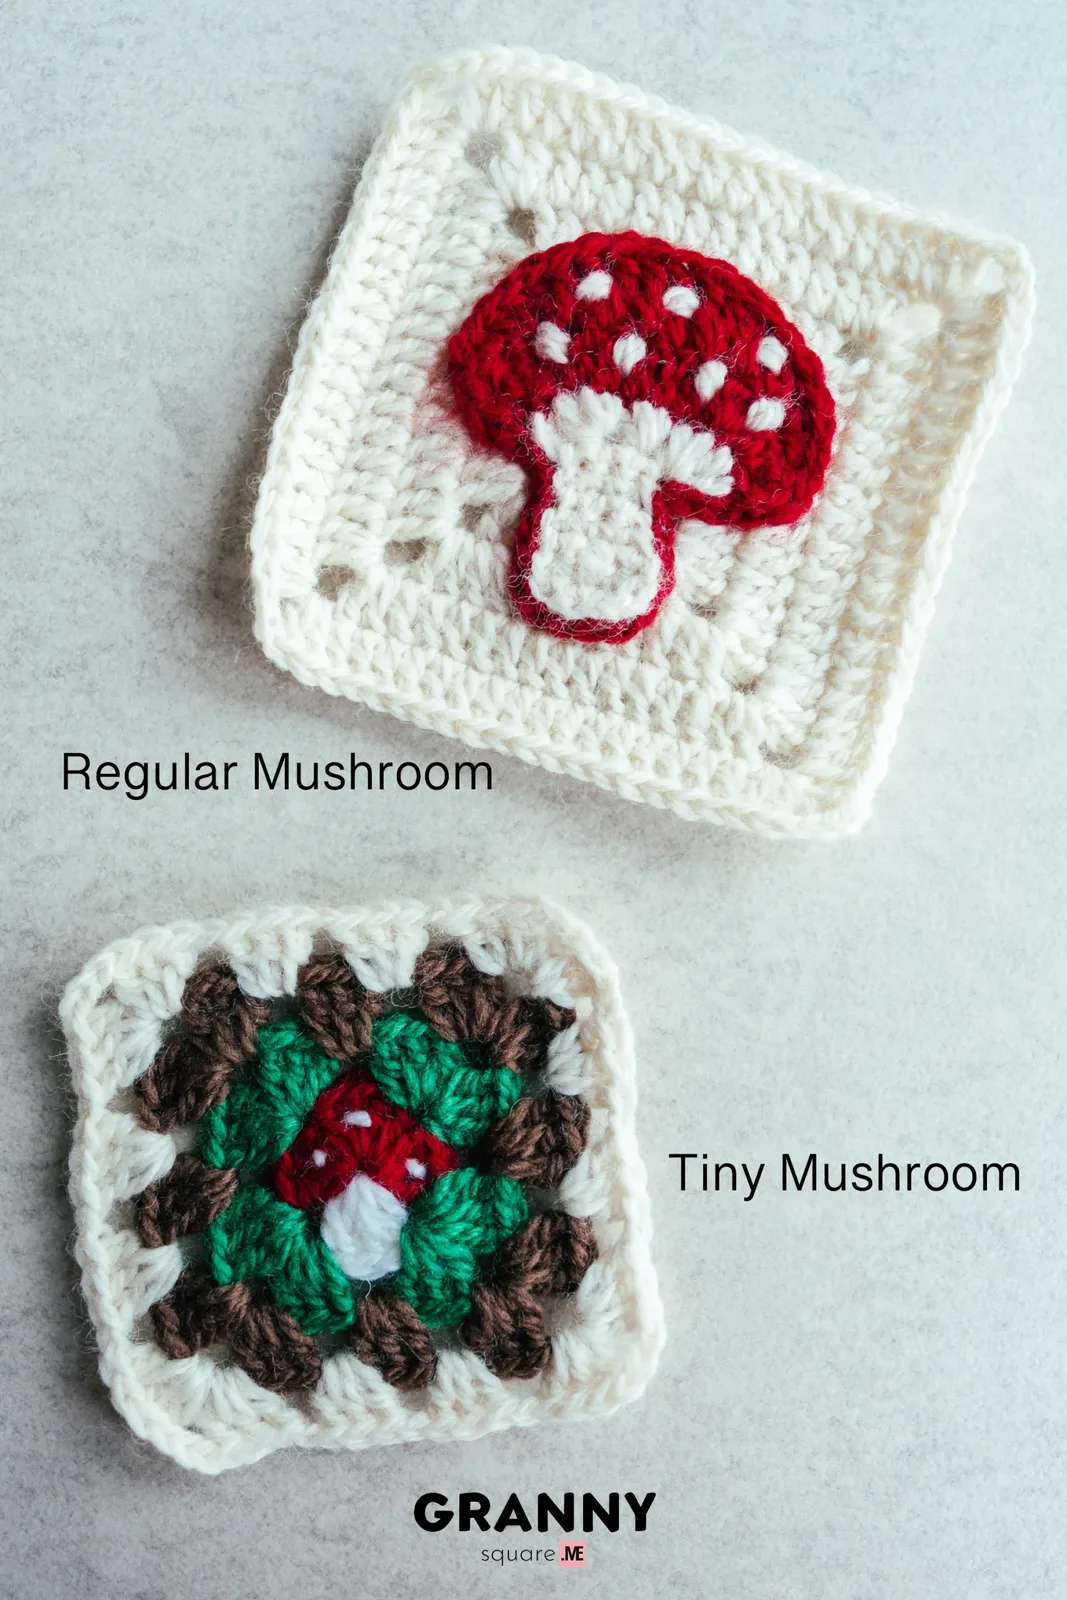
The tiny mushroom Unlike squares that stitch a separate appliqué onto the center, this design uses the basic granny square method — the mushroom is created by making small changes in this first round. The red cap and the white stem are both worked into the same magic loop.
- Round 1Magic loop, ch3(count as dc),9dc in the loop, ch1, with white yarn:ch1, 3dc in loop, ch1, red yarn:ch1, sl st to the top of the first ch3, fasten off.Step by step: Start with a magic loop. ch3 as a standing st (count as dc). 9dc in the loop, ch1, with white yarn: ch1. 3dc in the loop, ch1, with red yarn: ch1. sl st to the top of the first ch3, fasten off. Round 1 finished.
The green border Round 2 is the green border: switch to your green yarn here to work the grassy round of corner groups that starts squaring off the mushroom.
- Round 2New yarn in 4th dc st, ch3(count as dc)+2dc+ch3+3dc+ch1, [sk3, 3dc+ch3+3dc+ch1 in next st] repeat 3 times, (the 3rd and 4th groups were crocheted in the ch-sp) sl st to the top of the first ch3, fasten off.Step by step: Add new yarn in the 4th dc st. ch3 as a standing st (count as dc). 2dc+ch3+3dc+ch1 in the same st. [sk3, 3dc+ch3+3dc+ch1 in the next st] repeat 3 times (the 3rd and 4th groups were crocheted in the ch-sp), sl st to the top of the first ch3, fasten off. Round 2 finished.
Brown border Round 3 is the brown border: join your brown yarn in any corner and work a corner group in each corner space with a 3dc group along each side.
- Round 3New yarn in any corner, ch3(count as dc)+2dc+ch3+3dc+ch1, 3dc+ch1 in next ch-sp, [3dc+ch3+3dc+ch1 in next corner, 3dc+ch1 in next ch-sp] repeat 3 times, sl st to the top of the first ch3, fasten off (36).Step by step: Add new yarn in any corner space. ch3 as a standing st (count as dc). 2dc+ch3+3dc+ch1 in this corner space, 3dc+ch1 in the next ch-sp. [3dc+ch3+3dc+ch1 in the next corner space, 3dc+ch1 in the next ch-sp] repeat 3 times, sl st to the top of the first ch3, fasten off. Round 3 finished. (36)
Cream frame Round 4 is the cream frame: join your background color in any corner for the final round, working a corner group in each corner and two 3dc groups along each side.
- Round 4New yarn in any corner, ch3(count as dc)+2dc+ch3+3dc+ch1, *3dc+ch1 in next ch-sp* repeat 2 times, [3dc+ch3+3dc+ch1 in next corner, *3dc+ch1 in next ch-sp* repeat 2 times] repeat 3 times, sl st to the top of the first ch3, fasten off (48).Step by step: Add new yarn in any corner space. ch3 as a standing st (count as dc). 2dc+ch3+3dc+ch1 in this corner space, [3dc+ch1 in the next ch-sp] repeat 2 times. [3dc+ch3+3dc+ch1 in the next corner space, *3dc+ch1 in the next ch-sp* repeat 2 times] repeat 3 times, sl st to the top of the first ch3, fasten off. Round 4 finished. (48)
Finishing Add highlights using white yarn.
Important notes
💡 The completed granny square measures approximately 3.35 x 3.35 inches with DK sport yarn and a 5.00 mm hook. If your square needs to match other motifs in a blanket, crochet this one first and measure before committing — going up or down half a millimeter in hook size shifts the square by roughly a quarter inch
💡 Before fastening off round 1, place a stitch marker in the 4th dc counting from the top of the ch3. Round 2's entire geometry depends on joining in exactly that stitch, and it's much easier to mark it now than to re-count red stitches later
💡 Every round fastens off, so this little square generates a lot of tails — leave each one at least 6 inches long and weave ends into same-color stitches only, or the white stem tails will shadow through the red cap
💡 The standing ch3 joins mean you'll start rounds with a slip knot already on your hook. Keep that first chain snug against the joining stitch; a loose standing chain is the number-one cause of a visible 'seam' running up one side of a granny square
💡 Wind small bobbins of your four colors (cap, white stem, green grass, brown earth) before you start a batch of squares. With only a few grams needed per color per square, bobbins keep your project bag from becoming a four-skein tangle
💡 Give the finished square a gentle wet block, pinning all four ch-3 corners square. Because rounds 1 and 2 pack 13 stitches into a circle-to-square transition, blocking is what sharpens the corners and makes the mushroom sit perfectly flat
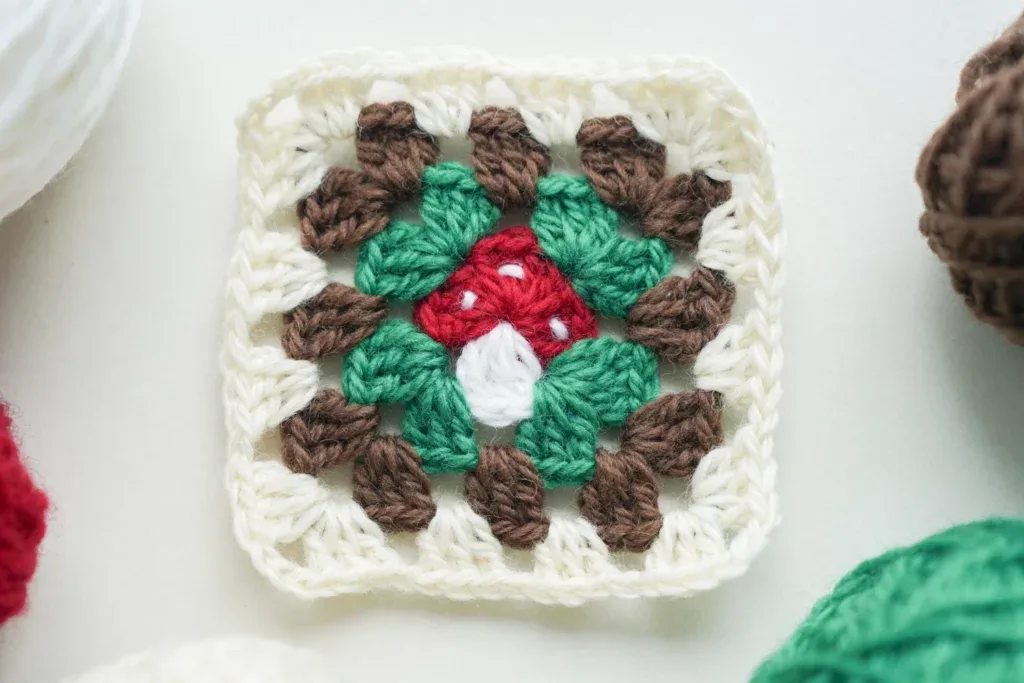
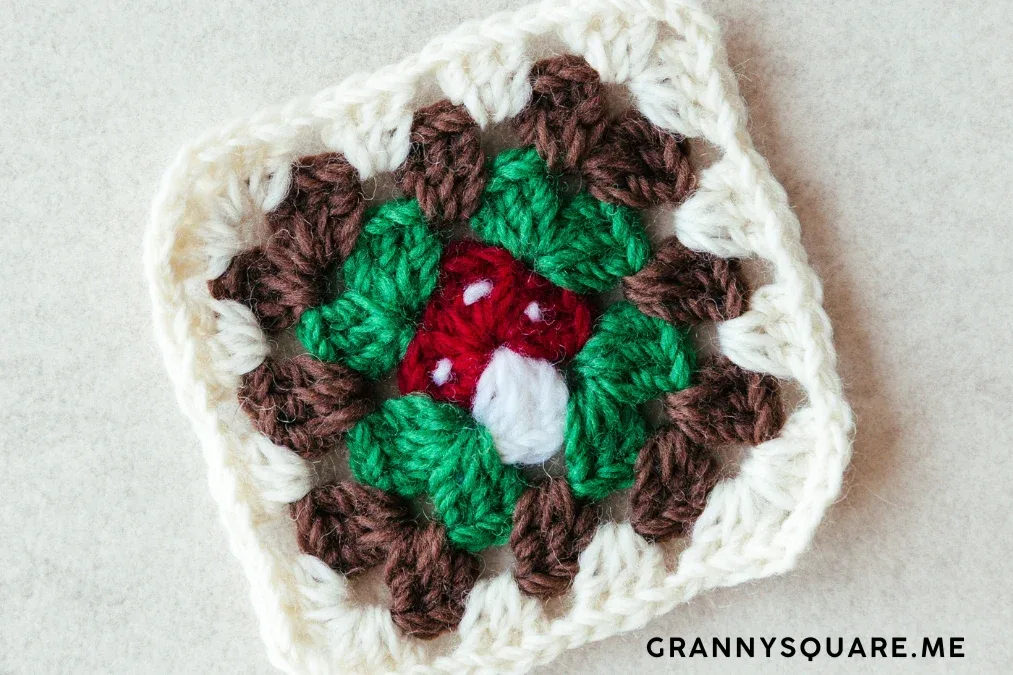
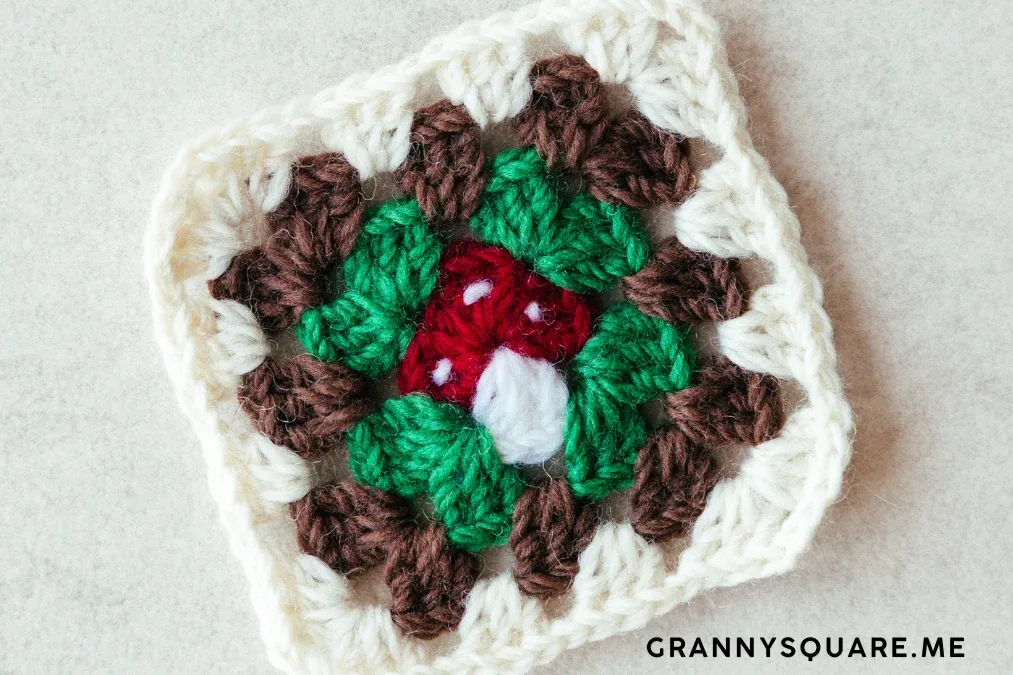
More photos
FAQ
Can I use worsted weight yarn instead of DK?
Absolutely — pair worsted with a 5.5 mm hook and the square comes out around 4 to 4.25 inches instead of 3.35. Just keep every square in a project at the same weight and hook so your blanket edges line up
I struggle with the magic loop. Is there an alternative start?
Yes — chain 4 and slip stitch into the first chain to form a ring, then work the ch3, 9 red dc, and 3 white dc into that ring instead. The center hole will be slightly more open than a tightened magic loop, but on a motif this small it's barely noticeable
Why does round 2 start in the 4th dc specifically?
That join position sets where the four corners fall, which rotates the square so the white stem sits centered along the bottom edge. Join anywhere else and the mushroom tilts toward a corner, so it's worth counting carefully or marking the stitch in advance
How many squares do I need for a blanket?
3.35 inches per square, a 10 by 12 layout gives you roughly a 33 by 40 inch baby blanket before bordering. For a throw, plan on 13 by 16 squares or enlarge each motif with an extra plain granny round to get there faster
Do I really have to cut the yarn at every color change?
The pattern is written with a fasten-off each round, and I recommend keeping it — it's what makes the cap, stem, grass, and earth colors crisp with no floats on the back. You could carry the green or brown up between rounds, but on a square this small the strands tend to peek through
Made your own square?
This site belongs to every crocheter. Share your design with the world — we’ll math-check the counts, polish it up, and publish it free for everyone, credited to you.
🧵 Share your pattern →
0 / 0 rounds