
Free Pattern
Step-by-Step
Crochet
Granny SquaresHow to Crochet an Orange Granny Square (Free Pattern)
Crochet a juicy orange slice granny square with this free pattern: hdc circle rounds, slip stitch segments, a green leaf, and a 3.95 inch square in DK yarn
Level IntermediateTime 1-2 HoursHook 3.00 mmYarn DK
About This Pattern
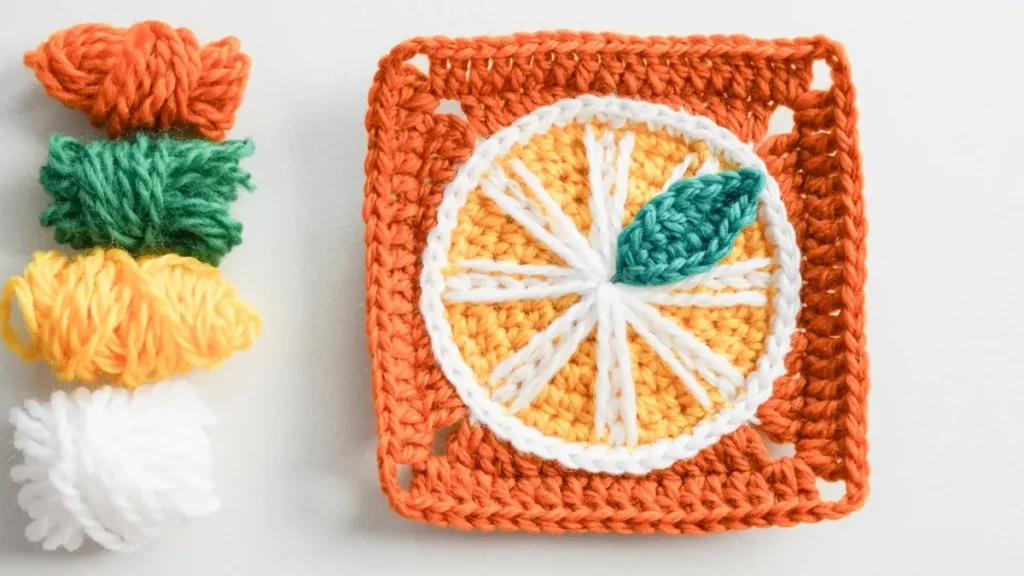
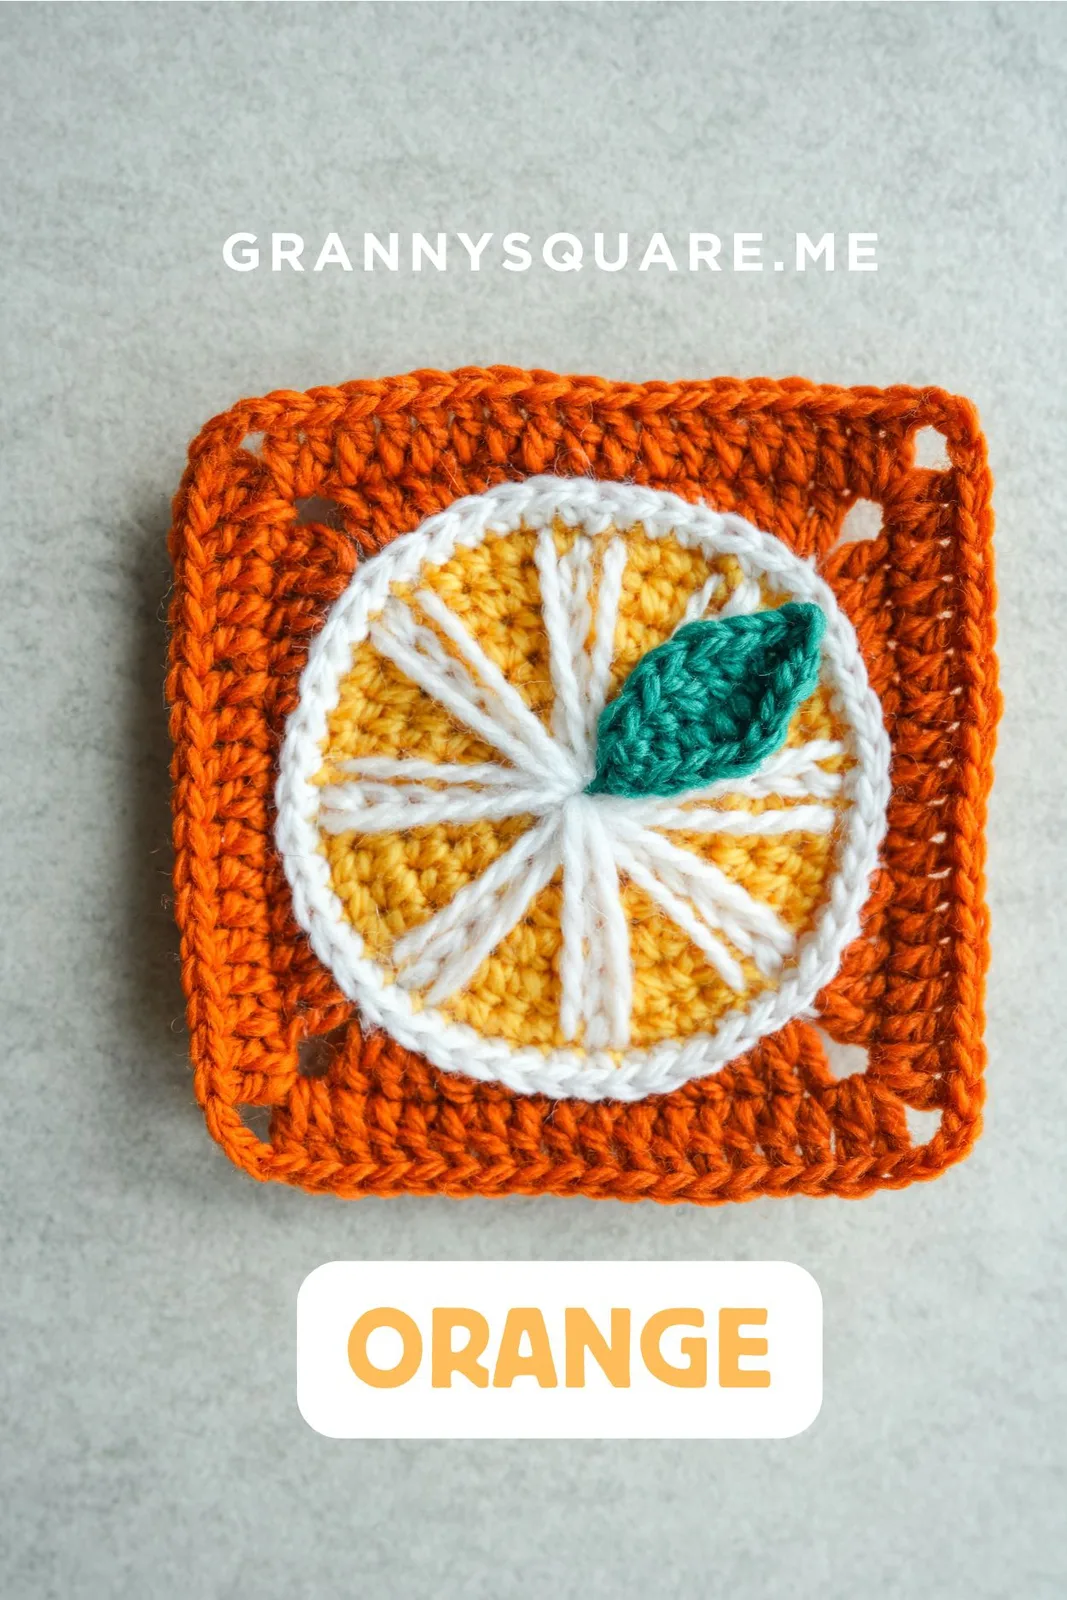
This orange granny square turns a simple crocheted circle into a slice of citrus so convincing you can almost smell it. Worked from a magic ring outward in cheerful orange, the circle is then divided into eight segments with crisp white lines that mimic the pith of a real orange slice, before being framed into a tidy square and finished with a tiny green leaf. It's perfect for crocheters who love fruit-themed makes, anyone building a food-inspired blanket, or motif collectors who want something more playful than a classic granny
The square uses a friendly mix of techniques: a magic ring start, single crochet and half double crochet increase rounds (growing from 8 stitches to a full 48-stitch circle), and the clever part — surface slip stitches worked from the center hole outward to create those eight segment lines, finished with yarn tails threaded through the middle for that juicy pulp effect. I'd call it a confident-beginner-to-intermediate make, and most crocheters will finish one square in about one to two hours
Finished in DK weight yarn with a 3.00mm hook, each square measures roughly 3.95 by 3.95 inches — a lovely, squishy little block with beautiful stitch definition. The four-color palette keeps things interesting without being fussy, and the segmented center gives it real visual pop. Make one as a coaster or appliqué, four for a mug rug set, or a whole basketful to join into a citrus-market blanket. They also make an adorable, quick handmade gift for any fruit-loving friend
Variations
I'll be honest — the moment I fell for this pattern was Round 7, when the white segment lines go in. You've got this sweet but ordinary orange circle, and then you start pulling white yarn up from the center hole, slip stitching your way out to the edge, and suddenly it's an orange slice. It genuinely made me grin. The tail-wrapping trick, where you thread the yarn back through the center hole on both sides of each line, is such a smart bit of construction — it creates that plump, pulpy look without any embroidery skills at all. I also love how forgiving the circle itself is: the hdc increase rounds grow quickly and evenly, so you get that satisfying flat disc almost on autopilot. It's a brilliant stash-buster too, since each square only sips a little yarn from four colors. And at under two hours per square, it's dangerously easy to tell yourself 'just one more slice' — my project basket currently looks like a fruit stand, and I regret nothing
Common mistakes
- Cinching the magic ring completely
- Pull the magic ring snug enough to be tidy, but leave a small needle-sized opening at the center. If you've already sealed it tight, use your darning needle to gently ease a small gap open before starting the white segment lines
- Forgetting that the ch2 counts as a
- Treat every ch2 as stitch number one of the round, and always join your slip stitch to the top of that ch2. Count after each round: you should have 8, 16, 24, 32, 40, then 48 stitches
- Working the surface slip stitch segment
- Go up a hook size just for the segment lines, or consciously keep each slip stitch loose and lazy. The line should lie flat on the surface like a drawn stroke, not cinch the fabric underneath it
- Spacing the eight segment lines
- Your finished circle has 48 stitches, so the lines belong every 6 stitches. Before you crochet a single white stitch, place 8 stitch markers around Round 6 at 6-stitch intervals, then work each line up the stitch column below a marker
- Cutting the white yarn tail too short
- Leave at least a 10-12 inch tail on every segment line. It feels wasteful until you're mid-wrap; any leftover gets secured and woven in at the back afterward
- Letting the slip stitch lines drift
- After each slip stitch, pause and find the stitch in the next round that sits directly above the one you just worked — follow the vertical column, not whatever stitch is nearest your hook. Straight columns are what make the slice look real


Intermediate
Materials
- Yarn of your choice —4 colors; the sample is made with DK sports. The finished granny square is about 3.95 inches by 3.95 inches.
- Crochet hook- we are using a 3.00mm hook
- Darning Needle
- Scissors
Main Pattern
- Round 1Orange center: Magic ring, ch1, 8sc, slst to the first sc.
- Round 2Crochet the orange flesh: ch2(count as hdc)+hdc to form hdc inc. hdc inc in remaining sts, slst to the top of the first ch2.
- Round 3Enlarge the flesh part: ch2(count as hdc)+hdc to form hdc inc, hdc. [ hdc inc, hdc ] rep 7 times, slst to the top of the first ch2.
- Round 4ch2(count as hdc), 1hdc, hdc inc. [ 2hdc, hdc inc ] rep 7 times, slst to the top of the first ch2.
- Round 5ch2(count as hdc)+hdc to form hdc inc, 3hdc. [ hdc inc, 3hdc ] rep 7 times, slst to the top of the first ch2.
- Round 6ch1 to start, 4sc, sc inc. [ 4sc, sc inc ] rep 7 times, slst to the first sc, fasten off.In this round, we're making an orange slice look so real! We'll divide our piece into 8 equal parts with white lines. These lines go from the center out to the edge. As we work, thread the yarn through the center hole — this makes your orange look like it has real, juicy pulp inside.
- Round 7Create orange pith: Pull new yarn from the center hole, slst in any st of Round 1, continue upward, sl st to the st in Round 2 that sits directly above. Repeat this through Round 6, cut the yarn and leave a long tail.Using the final slst as our reference point, pull your yarn tail up through the left gap and out the center hole at the back. Pull the same tail up through the right gap and out the center hole again. Secure at the back.Repeat this process 7 more times, spacing each set evenly around the circle.
- Round 8Crochet a peel round: Work into the sts of Round 6. Join new yarn to any st, ch1 to start, sc in each st, slst to the first sc, fasten off.
- Round 9Turn it into a square: TLO. Join new yarn to the sc directly above one of the segment lines. ch3(count as dc)+1dc to form dc inc, 1dc, 2hdc, 4sc, 2hdc, 1dc, dc inc, ch3. [ dc inc, 1dc, 2hdc, 4sc, 2hdc, 1dc, dc inc, ch3 ] rep 3 times omitting the final ch3, ch1, 1hdc connects back to the top of the first ch3.
- Round 10Ch3(count as dc)+1dc, dc in each st, 2dc+ch3+2dc in remaining corners, 2dc+ch3 in the start corner, slst to the top of the first ch3, fasten off.
- Add a leafWith green yarn: Knot, ch9, return, sk1, BL of next 8 ch(from 8th to 1st): slst, 1sc, 1hdc, 2dc, 1hdc, 1sc, slst. FL of next 8 ch(from 1st to 8th): slst, 1sc, 1hdc, 2dc, 1hdc, 1sc, slst. Fasten off and leave the tail.Position your leaf so it aligns with one of these segment lines. Thread the yarn tail through the center hole, then use a darning needle to stitch through both the leaf and the orange square, securing it firmly in place.
Important notes
💡 The sample uses DK weight yarn with a 3.00mm hook — deliberately smaller than the usual 4.00mm for DK. That tighter gauge gives the dense, crisp fabric the segment lines need to sit on, so resist the urge to size up unless you also want a bigger square
💡 Count at every join: 8 sc in Round 1, then 16, 24, 32, 40, and 48 as the increase rounds stack up. Catching a miscount one round late is a two-minute fix; catching it after the white lines are in means redoing the whole slice
💡 Place all 8 stitch markers for the segment lines before you pull up the first loop of white — one marker every 6 stitches around the 48-stitch edge. It takes thirty seconds and guarantees perfectly even wedges
💡 When threading the tail wraps through the center hole, do all your pulling from the back of the work. Tug just enough to seat the yarn into the gaps beside each line — over-tightening will dimple the center and warp your flat circle
💡 With four colors in play, you'll have a little crowd of ends. Secure each white tail at the back with a small knot-free anchor stitch through nearby loops before trimming, so the wraps can't loosen with use or washing
💡 Block your finished squares to a true 3.95 inches, especially if you're joining several into a blanket or coaster set. A gentle steam block (hover, don't press, if you're using acrylic) evens out the circle-to-square transition beautifully
More photos
FAQ
Can I use worsted weight yarn instead of DK?
Absolutely — pair worsted with a 4.00mm or 4.50mm hook and follow the pattern exactly as written. Your finished square will come out closer to 5 inches instead of 3.95, so just make sure every square in a joined project uses the same yarn and hook
Are the white segment lines embroidered or crocheted?
They're a mix of both, and it's easier than it sounds. The main lines are surface slip stitches worked with your hook from the center hole out to the edge, and then the leftover yarn tail is threaded with a darning needle through the center hole on each side of the line to plump up the pulp effect
Can I stop after the circle rounds and skip squaring it off?
Yes! The finished citrus circle is adorable on its own and makes a perfect coaster or appliqué. Just weave in your ends after the segment wraps are secured — though if you're joining squares into a blanket, you'll want the full square version for clean seams
Why is my circle ruffling or cupping instead of lying flat?
Ruffling means extra stitches — usually from working into the ch2 that already counts as a hdc — while cupping means missed increases. Recount at each join (16, 24, 32, 40, 48) and check your tension; a flat, relaxed circle is essential before the segment lines go in
How do I join these squares into a blanket?
Whip stitch through the back loops gives the flattest, least visible seam, while a single crochet join in a contrasting color adds a cute tile-grout look between slices. Block every square to the same 3.95-inch measurement first so your rows line up neatly
Made your own square?
This site belongs to every crocheter. Share your design with the world — we’ll math-check the counts, polish it up, and publish it free for everyone, credited to you.
🧵 Share your pattern →
0 / 0 rounds