
Free Pattern
Step-by-Step
Crochet
Granny SquaresSheep Granny Square Free Crochet Pattern – Fluffy Lamb Motif
Free sheep granny square crochet pattern with a fluffy 12-tuft face, BLO ears and DK yarn. Make a 3.43-inch lamb motif for blankets today
Level IntermediateTime 2-3 HoursHook 3.00 mmYarn DK / Sport
About This Pattern
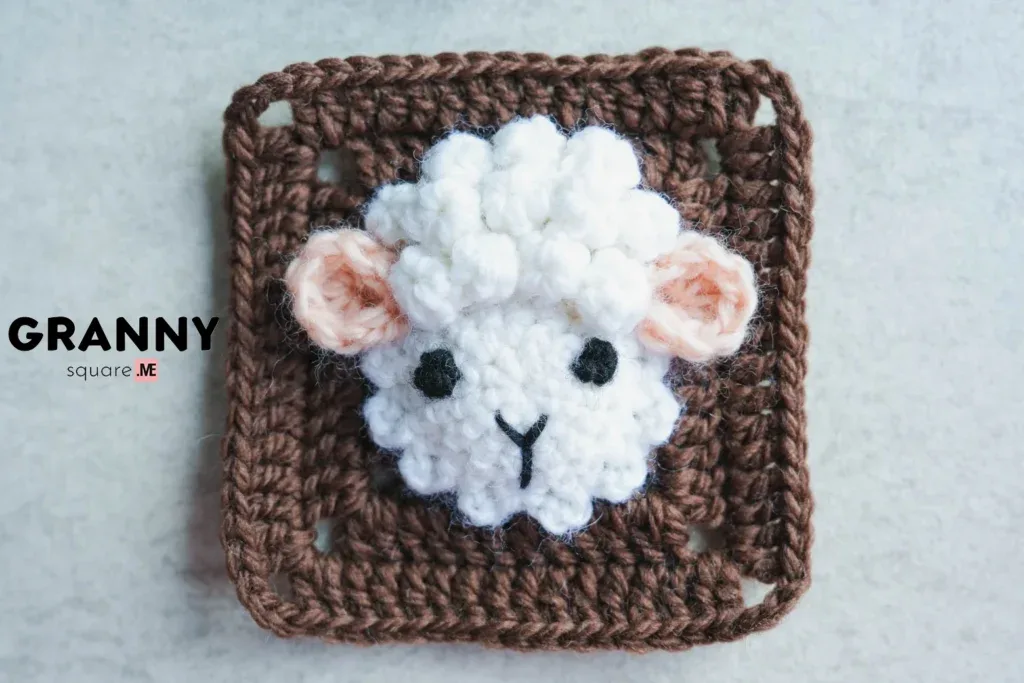
This pattern turns a plain solid granny square into a smiling little sheep, built from four separate components: a shaped face worked in the round from a magic loop, two floppy BLO ears with a curved 5dc tip, twelve tiny 6sc tufts that crowd the forehead into woolly fluff, and a simple solid granny square background that holds it all together. It's the kind of project that looks far more complicated than it is, which makes it perfect for anyone who wants a showstopper square without committing to a full amigurumi build
The techniques here are approachable but varied. You'll work a magic loop, single crochet increases, a round of alternating [1sc, sc inc], and then a back-loop-only round that creates the sculpted lip of the face. The ears introduce working into a foundation chain from both sides, plus a 5dc fan at the tip and a return pass into the front loop of the 2nd chain. Nothing is hard on its own, but the sequence rewards attention. Expect two to three hours total, with the twelve tufts taking the longest
Worked in DK sport wool with a 3.00 mm hook, the finished sheep granny square measures about 3.43 by 3.43 inches, which is a tidy, poppable size for joining into blankets, cushion fronts or a sampler throw. Because the curly hair sits proud of the surface, the finished square is thick, which makes it a great choice for a pillow cover alongside other animal granny squares. The face sits slightly raised off the background thanks to that BLO round, and the tuft cluster gives the top of the head real dimension you can feel under your fingertips. Made with a fluffy white face, pink ears and curly white hair, it reads instantly as a lamb and charms absolutely everyone who picks it up
Variations
The obvious swap is colour, and this square takes it well because you have four separate colour slots: background, face, ears and hair. The sample is the classic lamb - a fluffy white face with pink ears and white curly tufts - and it looks lovely on a soft sage or dusty blue background. For a black-faced Suffolk sheep, work the face and ears in charcoal and keep the tufts snowy white on a buttermilk square. Want something less literal? Try pastel rainbow tufts on a white face for a nursery-mobile look, or an all-over monochrome version in three shades of oatmeal that reads as texture rather than character. Size is easy to shift. Go up to worsted with a 4.00 mm hook and the square lands closer to 4.5 inches, which speeds a blanket up considerably. Going the other way with 4-ply and a 2.50 mm hook gives you a dainty 2.5-inch square for coasters or a doll blanket. If you want a bigger face without changing yarn, add a fifth round of [2sc, sc inc] repeated 8 times before the BLO round, then work [ch2, 2slst] 10 times instead of 8 to match the wider circumference. For a fluffier sheep, make 16 or 18 tufts instead of 12 and pack them in two staggered rows. Yarn substitutions worth trying: Paintbox Simply DK for budget colour range, Drops Merino Extra Fine for a softer face, or a mohair-blend held together with the tuft colour for genuinely fuzzy wool. And because the curly hair makes the square thick, a set of these mixed with other animal granny squares turns into a brilliant pillow cover - swap the background to pale green for a spring version, or to soft blue and pink for a new-baby set
Common mistakes
- Starting the magic loop for the face
- The magic loop tail needs a hard tug before you work round 2, not after you finish. Work all 8sc into the loop, slst to close, then pull the tail firmly so the ring cinches shut, and weave the tail in rather than trimming it short. A short-trimmed tail will work loose as the square is handled and the hole reopens
- Losing the round-start position because
- In this pattern the ch1 counts as the first stitch of the round, which means your slst at the end goes into that ch1 stitch, not into the sc beside it. Drop a stitch marker into the ch1 the moment you make it. If you slst into the wrong place your stitch count drifts by one every round and the round-4 [1sc, sc inc] repeat won't land evenly
- Working the BLO round through both loops out of habit
- Round 5 must be back loop only. Working both loops flattens the face completely and you lose the raised muzzle that makes this square look sculpted. Before you begin, tilt the work toward you so the back loops sit up as a visible ridge, and slow down for the first two or three [ch2, 2slst] repeats until your hand learns the angle
- Ears coming out flat and stiff instead of softly curved
- The curve comes from the 5dc all crowded into the final chain, so those five stitches must genuinely share one chain space. If they feel too tight, loosen your ch3 foundation slightly rather than spreading the dc across two chains. Also make sure the return pass 1hdc+1sc goes into the front loop of the 2nd ch only, which is what lets the ear fold and droop
- Tufts unravelling or flattening once they're sewn
- Each tuft is a 6sc magic loop with the tail pulled tight and fastened off, so it lives or dies by that cinch. Pull the tail until the centre hole is invisible, then use that same tail to sew the tuft down rather than starting new yarn. Sew through the base of the tuft only, never through the top, or you'll squash the dome you just made
- Sewing the face and tufts onto the
- Pin everything first. Lay the solid granny square flat, position the face slightly below centre so there's room for the tuft row above it, tuck the ears under the face edge rather than beside it, then pin all twelve tufts before a single stitch goes in. Remember the face is sewn on first and stuffed to shape before you close the last section, so leave yourself an opening - discovering afterwards that the tufts won't fit is the number one reason people frog this square


Intermediate
Materials
- Yarn of Your Choice - 4 colors, the sample is made with dk sport wool yarn, with a 3.00 mm crochet hook, the finished Sheep Granny Square is about 3.43 × 3.43 inches
- Crochet Hook, we used a 3.00 mm hook
- Darning Needle
- Scissors
- A small amount of stuffing - the face is stuffed to shape it before closing
The Face, Ears & Hair of the Sheep
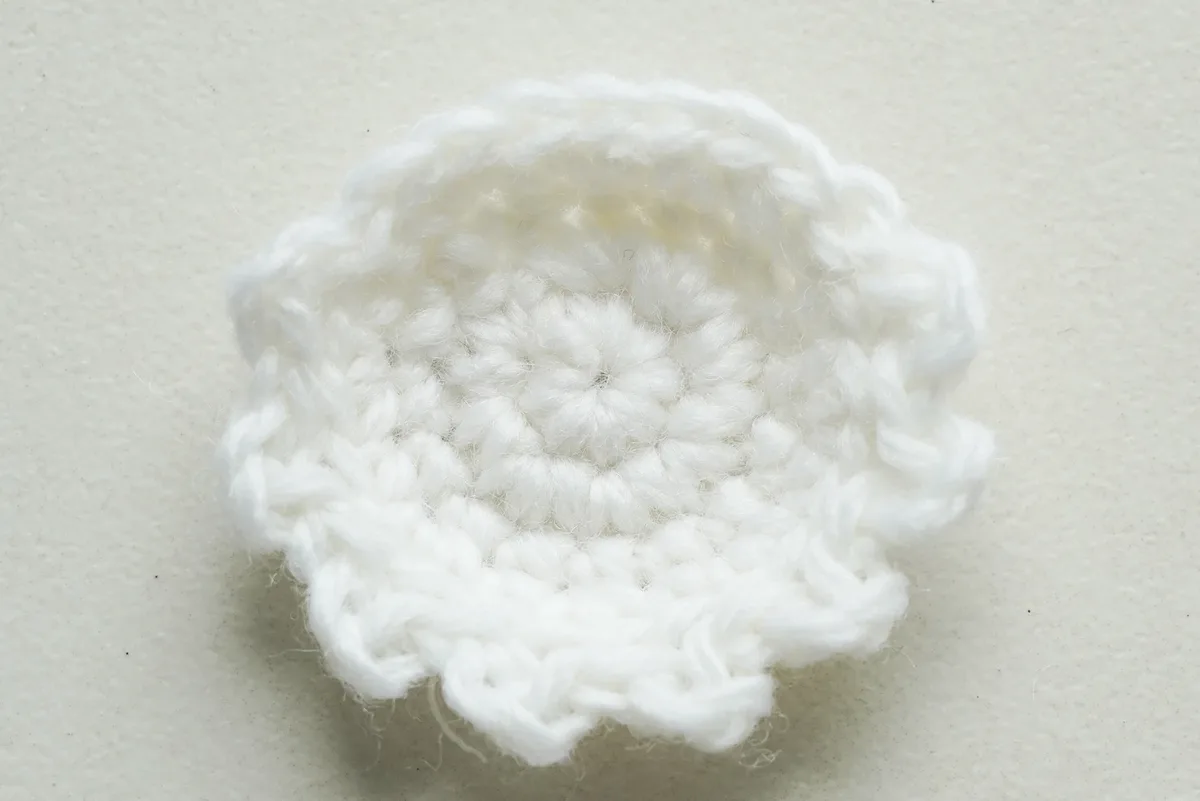
The Face of Sheep The little sheep has a fluffy white face, pink ears and lovely curly hair. Rounds 1-5 below make the face, worked in the round from a magic loop. Note that the ch1 at the start of each round is used as a standing stitch, so it counts as the first stitch of that round.
- Round 1Magic loop, ch1 as a standing st, 8sc, slst to the first sc.
- Round 2ch1 as a standing st, sc inc in each st around, slst to the first sc.
- Round 3ch1 as a standing st, sc in each st around, slst to the first sc.
- Round 4ch1 as a standing st, 1sc in the same st, sc inc; [1sc, sc inc] repeat 7 times, slst to the first sc.
- Round 5BLO. [ch2, 2slst] repeat 8 times, fasten off.The Ear of Sheep ch3, return, sk1 and BLO: 1sc+1hdc, 5dc in the final ch. Turn to the opposite of this chain: 1hdc+1sc in the FL of the 2nd ch. Slst to the initial sc, fasten off. Make another ear in the same way. One tuft - make 12 Magic loop, ch1 as a standing st, 6sc, slst to the first sc. Pull the tail tightly and fasten off. This is one tuft of hair. Make a total of 12 tufts like this.
The Hair of Sheep The curly hair is made from twelve separate little tufts, and it is what makes this sheep granny square thick.
Granny Square Background & Assembly
Granny Square Background Create a simple, solid granny square for the perfect background. The four rounds below work it from a magic loop, with (2dc+ch3+2dc) in every corner.
- Round 1magic loop, ch3 (count as 1dc), 3dc+ch3; [4dc+ch3] repeat 3 times, omit the final ch3, work ch1+1hdc to join the top of the first ch3.
- Rounds 2-3ch3 to begin (count as 1dc), 1dc in the same corner. Work 1dc in each st around, (2dc+ch3+2dc) in each corner as you go. When you reach the end of the round and return to the starting corner, 2dc into the starting corner, join the round with ch1, 1hdc into the top of the beginning ch3.
- Round 4Work as above for sides and corners. When you return to the starting corner, work 2dc+ch3, then slst to the top of the first true dc. Fasten off.Step by step: the face Turn the face to the wrong side and position the wavy edge at the bottom. Sew it onto the square. Stuff to shape it before closing. Step by step: finishing Then, attach the two ears, and sew the hair pieces on. Finally, stitch the nose and make two French knots for the eyes.
Assemble With all four components made - the face, the two ears, the twelve hair tufts and the solid granny square - put the sheep together as follows.
Important notes
💡 The sample uses DK sport wool with a 3.00 mm hook, which is a full hook size down from standard for that weight. That tightness is deliberate - it keeps the face fabric dense so no stuffing or backing shows through and stops the tufts from sinking into gaps. If your face piece looks loose or holey, drop to 2.75 mm before you blame the pattern
💡 Make all twelve tufts in one sitting before you assemble anything. They are identical and repetitive, and batching them means you only get into the magic-loop rhythm once. Keep them in a small dish so they don't roll off the table - they are tiny enough to vanish into a sofa permanently
💡 Use a locking stitch marker in the ch1 standing stitch at the start of every round on the face, and move it up as you go. Because ch1 counts as a stitch here, an unmarked round is genuinely hard to read back, especially in pale cream yarn where the stitch definition is soft
💡 Leave a generous 8-10 inch tail when you fasten off the face and each ear. You'll want that length for sewing, and joining fresh yarn for assembly means extra ends to weave into a small square that already has a lot going on at the back
💡 Block the solid granny square background before assembly, not after. Once the face, ears and twelve tufts are attached, you can't pin the square out flat without crushing the 3D elements. A quick spray-and-pin to a true 3.43-inch square first makes joining the finished squares into a blanket dramatically easier
💡 A darning needle with a blunt tip is essential here rather than a sharp tapestry needle. You'll be sewing through the base of tiny 6sc tufts twelve times, and a sharp point splits the yarn plies and weakens the cinched centre exactly where it needs to hold
💡 This square finishes up thick because of the curly hair, so it is a great one to make in a set and turn into a pillow cover alongside other animal granny squares. Four colours are used in the sample: one for the background, one for the face, one for the ears and one for the hair
More photos
FAQ
How big is the finished sheep granny square?
Worked as written in DK sport wool with a 3.00 mm hook, the square finishes at roughly 3.43 by 3.43 inches. Your exact size will shift with yarn brand and tension, so make one square first and measure before you calculate how many you need for a blanket
Do I really need to make all 12 tufts?
Twelve is what gives the forehead its full woolly look, but you can absolutely use fewer if you prefer a tidier sheep - eight still reads clearly as fleece. Just space them evenly across the top of the face rather than clustering them, or the head looks lopsided
Can I use worsted weight yarn instead of DK?
Yes, move up to a 4.00 mm hook and the square will finish around 4.5 inches instead of 3.43. Everything else stays the same, but be aware your tufts will be noticeably chunkier, so you may want to make 10 instead of 12 so they don't crowd the forehead
Should the sheep face be stuffed?
Yes. The pattern tells you to turn the face to the wrong side, position the wavy edge at the bottom, sew it onto the square and stuff it to shape before you close the last section. Only a small amount is needed - just enough to round the face out, since overstuffing makes it bulge and pulls the granny square out of square
Made your own square?
This site belongs to every crocheter. Share your design with the world — we’ll math-check the counts, polish it up, and publish it free for everyone, credited to you.
🧵 Share your pattern →
0 / 0 rounds